REXX Execution Explained: Explicit, Implicit and Batch
New-to-Z systems engineer Stephen Johnston explains the three primary ways to run REXX on z/OS, something that's not immediately obvious to new mainframers

When working with REXX on z/OS, writing your exec is half the battle. The other half is knowing how to run it. If you’re new to Z, like me, it’s not immediately obvious how you run scripts on z/OS, unlike the “user friendly” IDEs on desktop environments with pretty GUIs that make everything just one click away.
By the end of this article you’ll understand the three primary ways to run REXX on z/OS: Explicit, Implicit and Batch.
Explicit Execution
With explicit execution, you’re running your EXEC from the TSO command line (Option 6), ISPF Edit or a dataset member list line command. With the first two forms of explicit execution, we will need to know the fully qualified dataset name and the member name.
Explicit Execution in ISPF Edit
If you’re executing your EXEC from ISPF Edit, the fully qualified dataset name and the member name can be found on the header line.
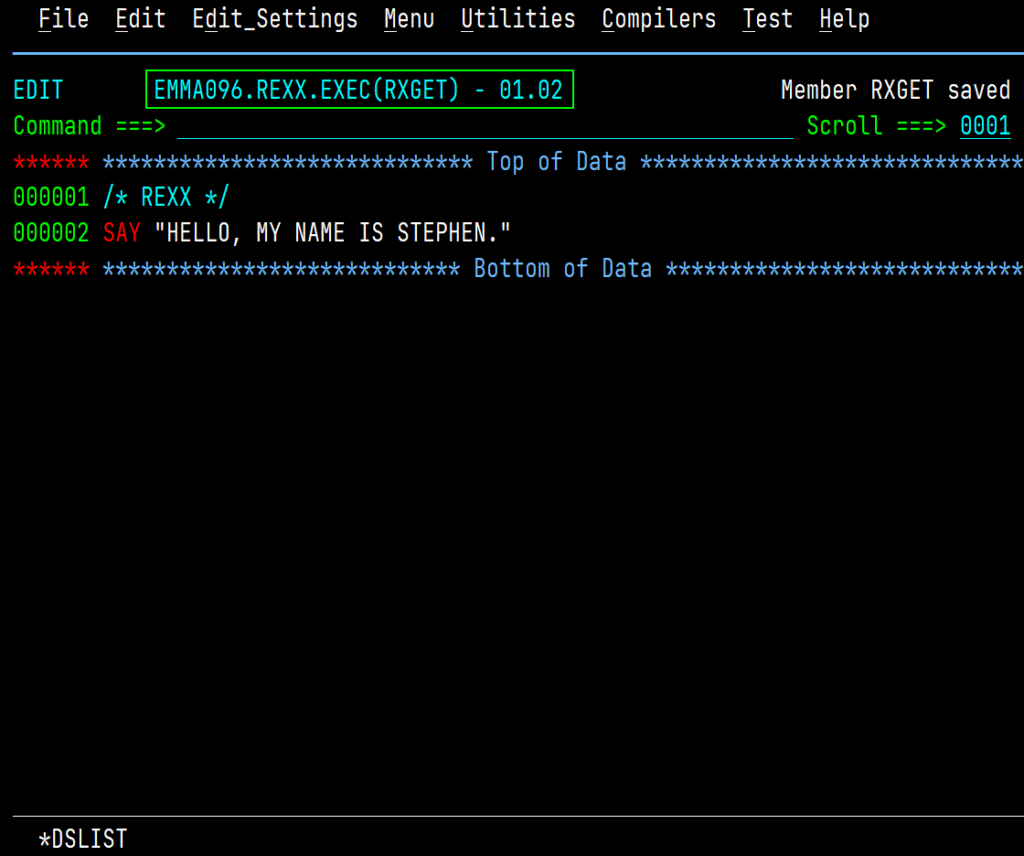
From the primary command line in ISPF Edit, you can issue the TSO command, followed by the EXEC (or EX) command, the fully qualified dataset name in single quotes, with the member name specified inside parentheses.
Example 1:
TSO EXEC ‘YOUR.REXX.EXEC(MEMBER)’ EXEC
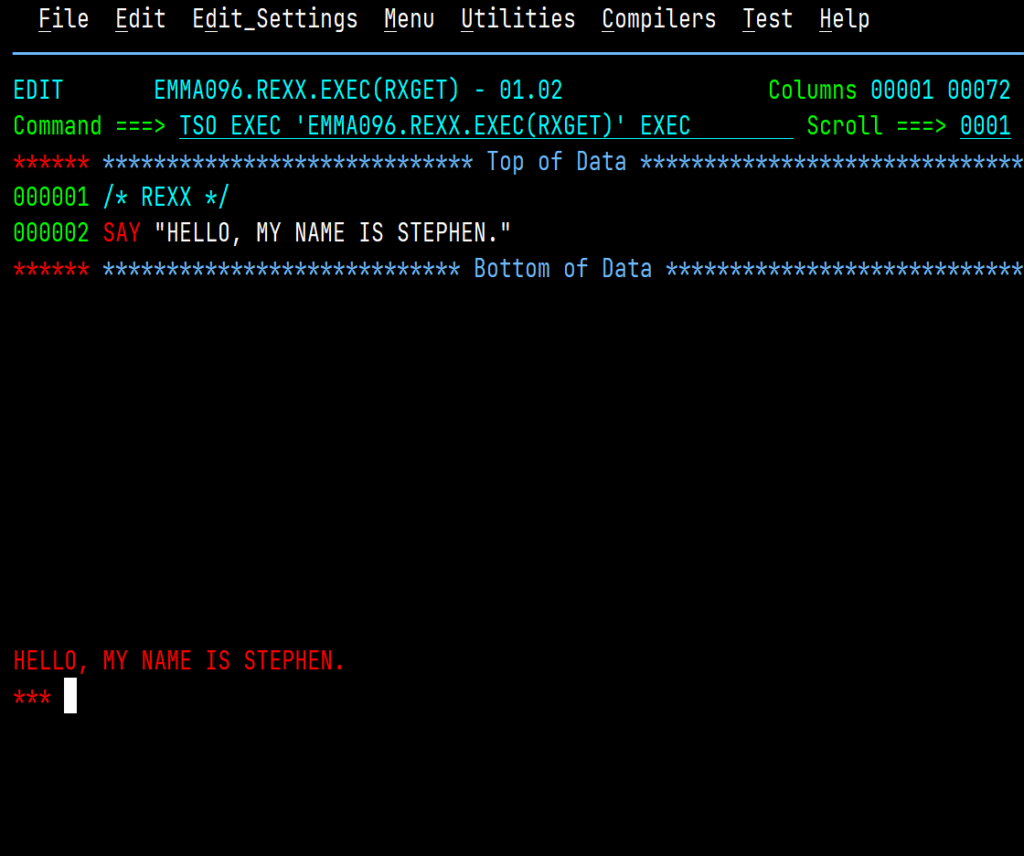
Why do I preface with TSO?
Inside ISPF Edit, ISPF needs the TSO prefix so it knows that we want to use the TSO command processor, and not an edit macro.
Explicit Execution From the TSO Command Line
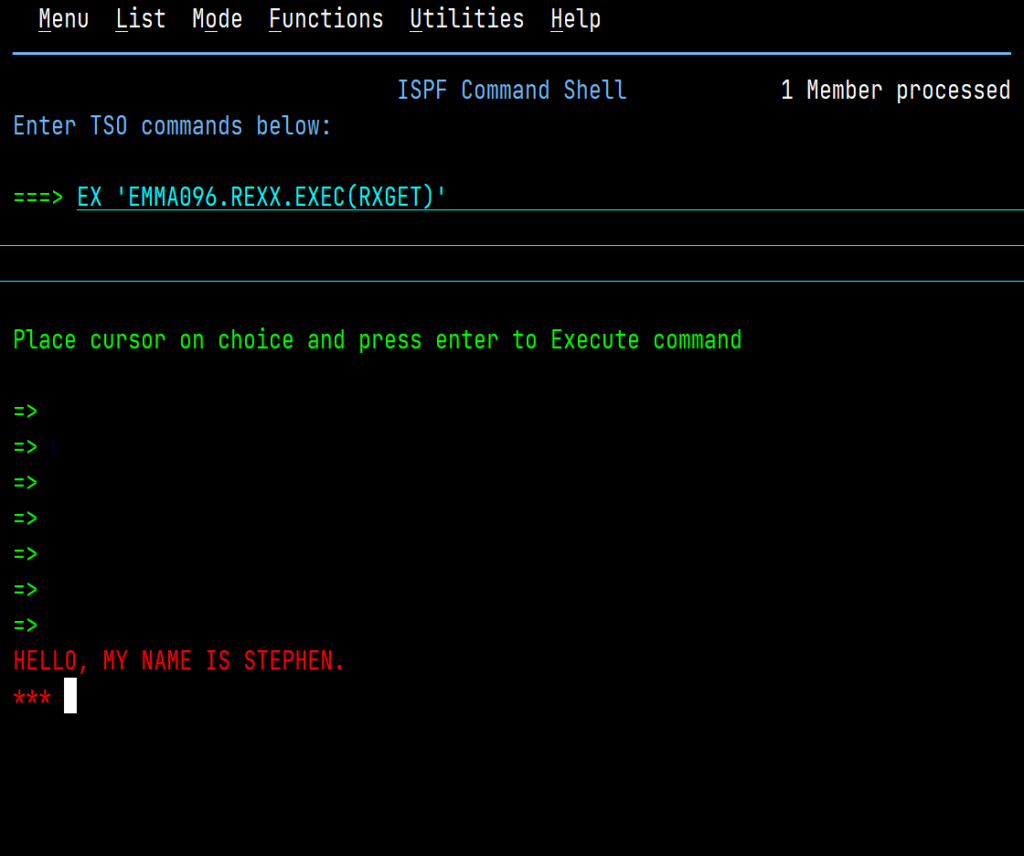
The second example of explicit execution takes place on the TSO Command Line (ISPF Option 6). Because we’re in the TSO environment, the TSO prefix can be dropped.
Example 2:
EXEC ‘YOUR.REXX.EXEC(MEMBER)’ EXEC
Explicit Execution From the Data Set List
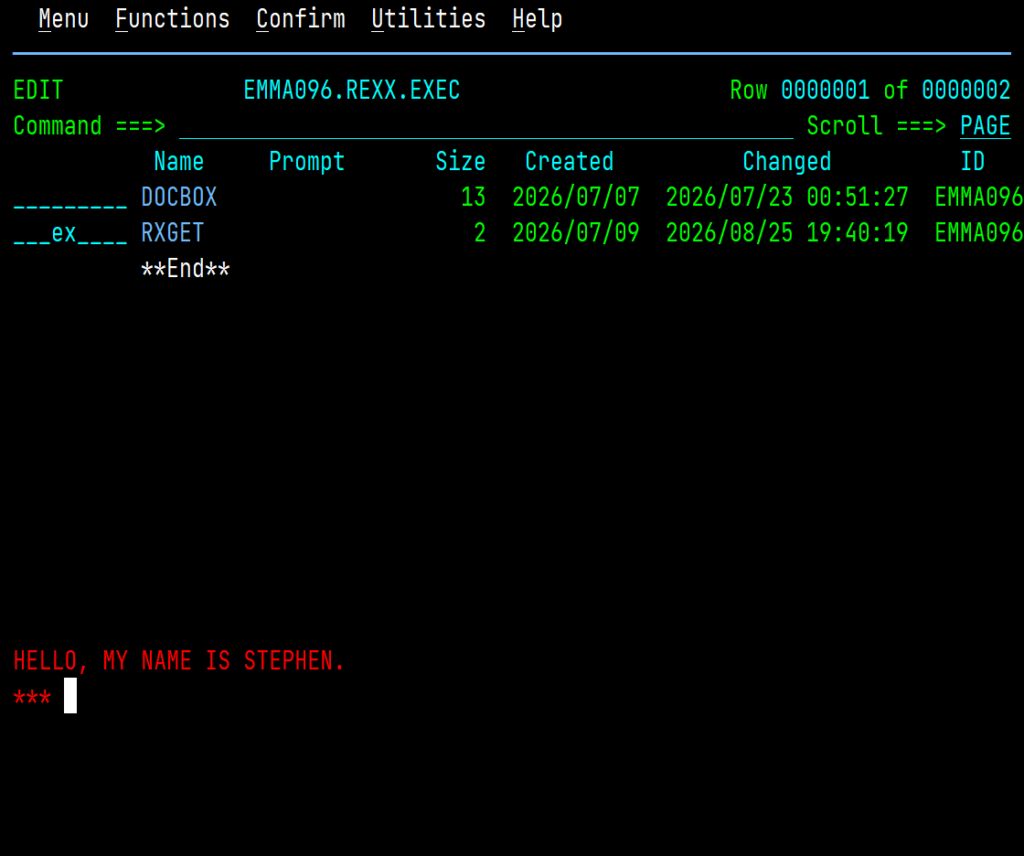
In our third example of explicit execution we’ll use a line command from a dataset member list.
To do this, position your cursor to the left of the member, type the command EX, and press Enter. Under the hood, this is the short form of TSO EXEC.
Implicit Execution
Now that you’ve learned about explicit execution, let’s take a look at implicit execution. Implicit execution is neat, because unlike before, where we had to know the fully qualified dataset name, with this we only have to provide the member name. However, it does require one additional step, which is to concatenate our REXX exec library to the SYSPROC or SYSEXEC libraries. The SYSEXEC library is exclusively for REXX, and the SYSPROC library is both REXX and CLISTs.
NOTE: Always check with your system administrator first, because you may already have a library allocated.
For this example, we’ll concatenate to the SYSEXEC library. To do this, navigate to Option 6, and execute the following command:
Example 3:
ALLOC FI(SYSEXEC) DA(‘YOUR.REXX.EXEC’) SHR REUSE
| Full Keyword | Abbreviation | What it does |
| ALLOCATE | ALLOC | Informs TSO that we’d like to allocate a data set or member |
| FILE | FI | Specifies the destination DD name—in this case, SYSEXEC |
| DATASET | DA | Specifies our personal data set |
| SHARE | SHR | Allows for concurrent reads. |
| REUSE | REUSE | Will safely free or un-allocate SYSEXEC if it is already in use before relinking it. |
Once allocated, you can execute your REXX from any TSO or ISPF command line simply by typing its member name (see Figure 5).
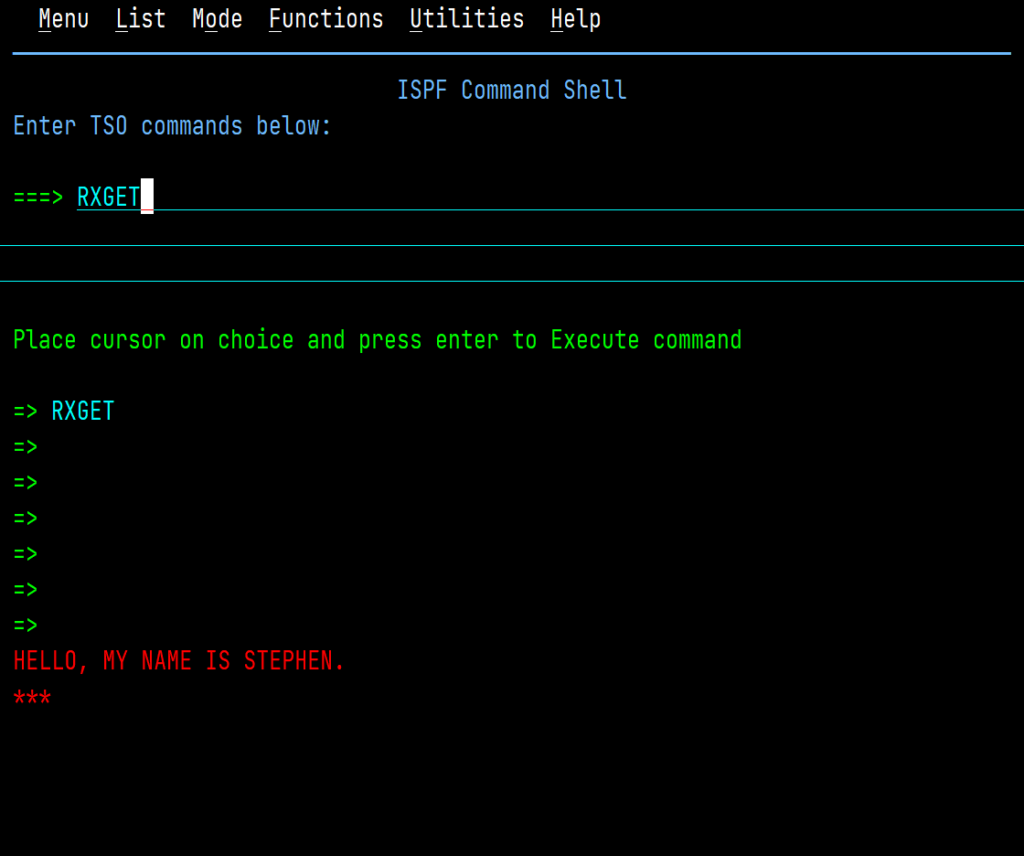
While out of scope for this article, when we cover edit macros for ISPF Edit, we’ll be using this method.
Batch Execution
For our third method, let’s take a look at how we can do batch execution, and this is done through JCL. This is kind of a weak point for me right now because I’m still not an expert in JCL, so you have been warned!
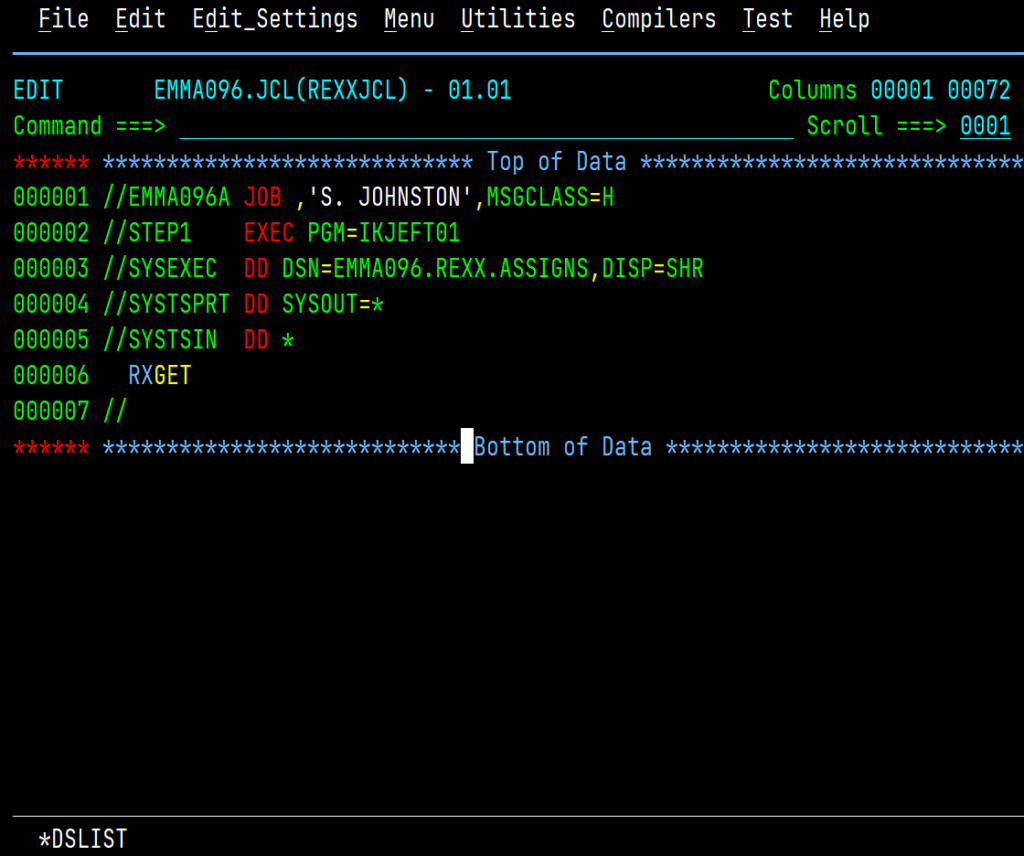
I won’t go into a lot of detail here, but there are a couple lines we want to look at. The first is line 000003.
//SYSEXEC DD DSN=EMMA096.REXX.EXEC,DISP=SHR
This line is pointing the job at a dataset, so when we call the member name below, it knows where to look. Then looking at line 0000005, we find the SYSIN step here. My understanding of SYSIN is it basically acts as kind of the keyboard. And then we have line 0000006, which in this case we’re just telling it, “Hey, this is the program that we want to run” or the member we’re pointing at, which is RXGET.
Again, I’m not a JCL expert at this point, and I’m scared of fire, so please leave the torches at home!
Running Your Batch Job
If you’re 100% new to z, this part may seem like a lot, but fear not! As you grow, this will become second nature to you.
From the primary command line, type the command: SUB. This is short for submit and, once you press Enter, it will send your JCL (or Job) off the mainframe gremlin who will do amazing things with it.
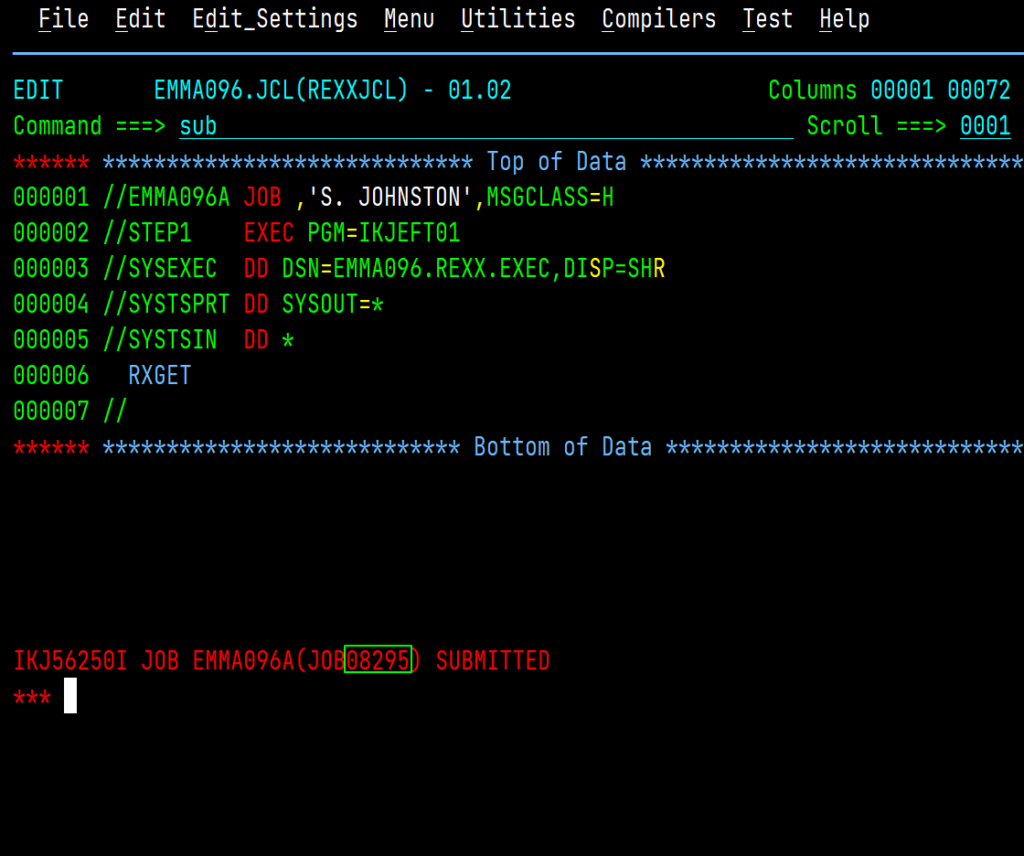
Once you’vesubmitted your job you’ll see what’s called a Job ID. I made a habit of taking note of this number so I could find it later on. Press Enter one more time and the message will go away.
Finding your job
Now that the mainframe gremlin has processed our job (assuming you don’t have a massive queue), we need to find out if everything went well. To do this, we’re going to be using System Display and Search Facility (SDSF). It’s your window into mainframe activity.
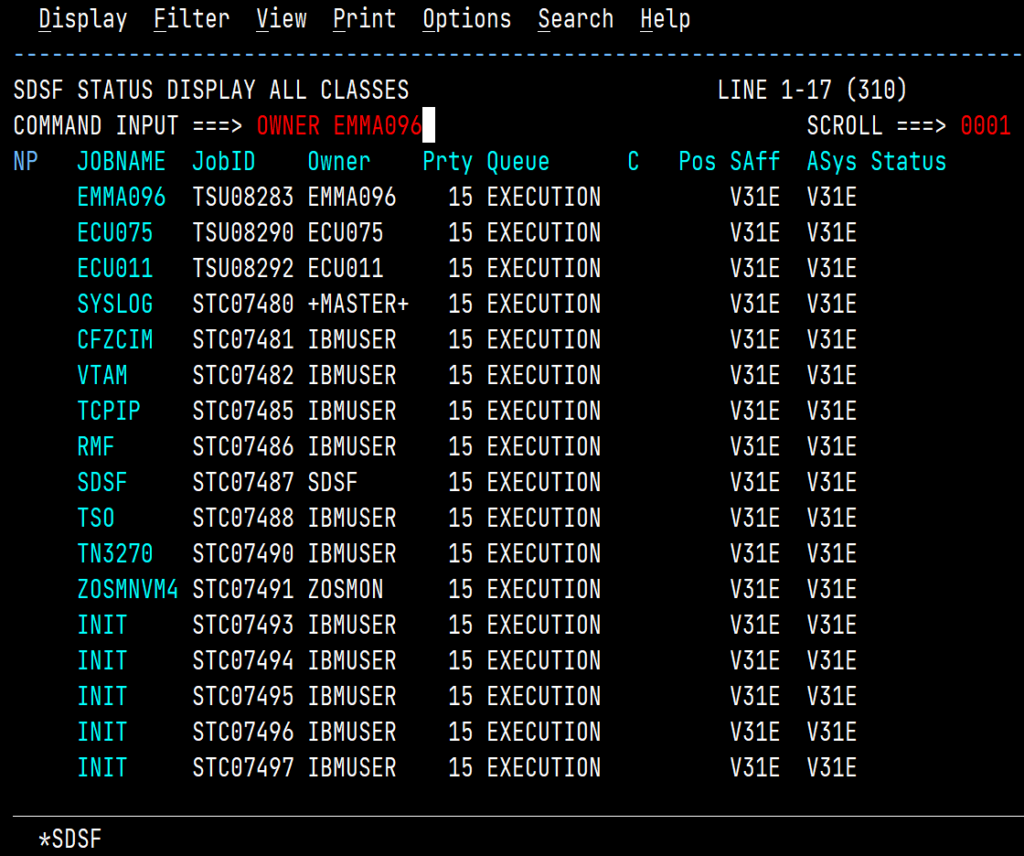
How you access SDSF is usually determined by your site, but on the system I use from EMMA it’s 13.14.st (the ST standing for Status). Once there, you will see a table with lots of entries. It is important to note that I have filtered my results down to my TSO ID (see Filtering by TSO ID).
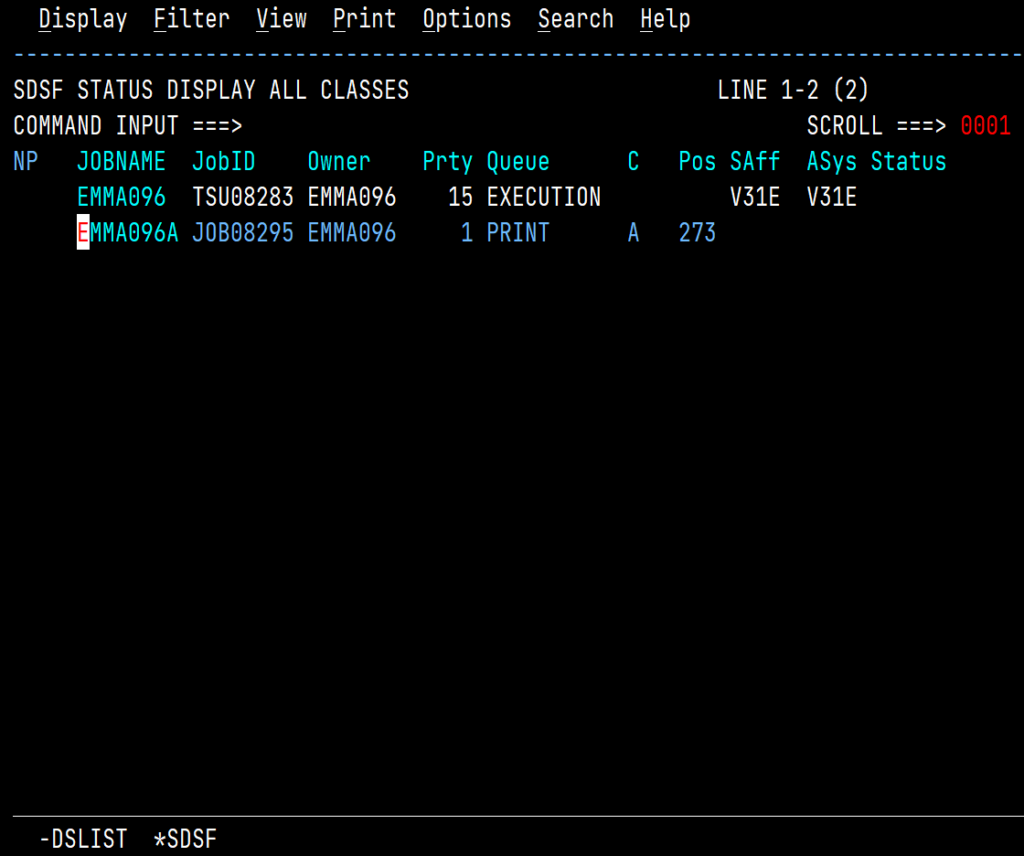
To the left of your job you can type line commands. There are two ways that I know of to view the output, and we’re going to use the quicker (in my opinion) one, which is S. Once you do, you’ll be taken to another panel that shows a LOT of information.
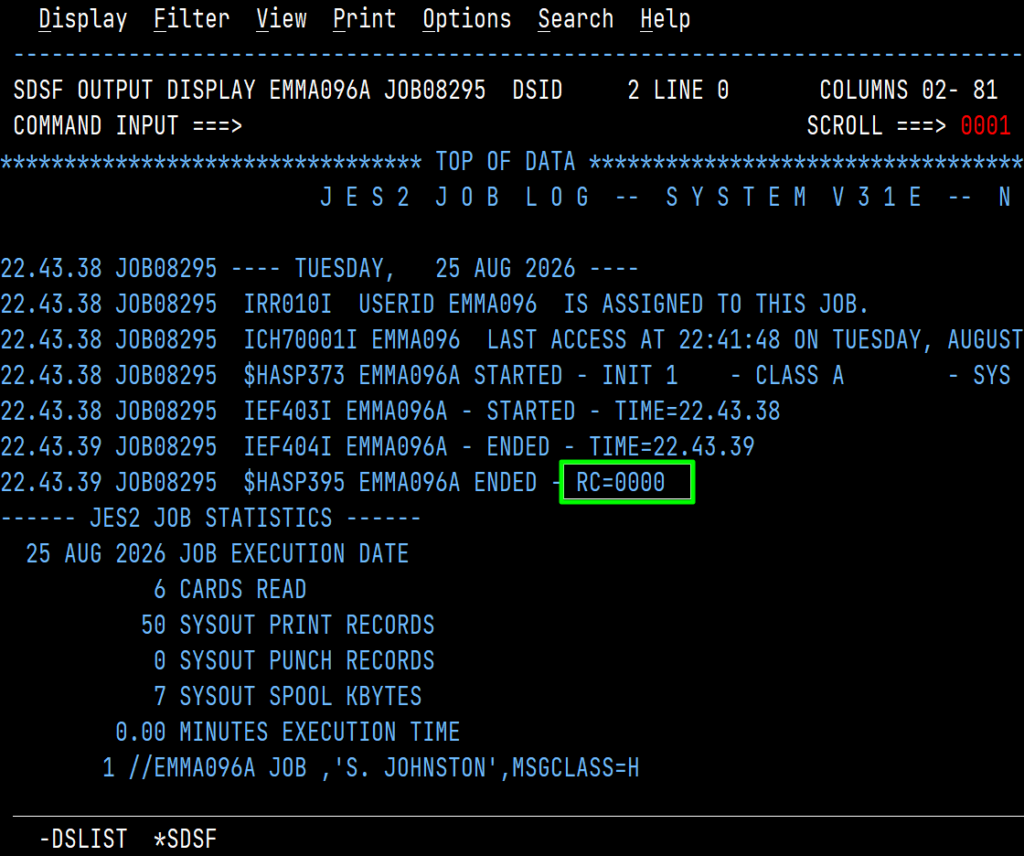
While I knew this was going to run successfully, if you are checking your jobs, you should ALWAYS check the return code (RC) status. In this case, my RC is 0000, which means the mainframe gremlin was happy with the task we gave him.
Because our job produced output, we probably want to view that. Because this example only has one line of output, we can type the keyword BOT on the command input line and press Enter. This will take you to the bottom of your output, where we can see the result.
Filtering by TSO ID
To filter out all of the noise on the command input, simply type OWNER [YOUR_TSO_ID], and press Enter.
Summary
In this article, we’ve covered three ways to execute REXX on z/OS. I encourage you to watch my video as well. Until next time, may the code be with you!