Managing Prestart Server Jobs by Remote IP Address
There may be times you want to find prestart jobs associated with a remote IP address. In this case, you will want to use one of the various Netstat interfaces

I recently wrote Work with Active Prestart Jobs, which reviewed how you can manage your prestart server jobs with WRKACTJOB. This approach works well if you want to find jobs by subsystem, job name or the job’s current user profile.
There may be times you want to find prestart jobs associated with a remote IP address. In this case, you will want to use one of the various Netstat interfaces:
- WRKTCPSTS OPTION(*CNN), aka Netstat, character-based interface
- Navigator for i IPvx connections
- IBM i Services QSYS2.NETSTAT_JOB_INFO and QSYS_NETSTAT_INFO
- TCP/IP APIs, Retrieve Network Connection Data (QtocRtvNetCnnDta) and List Network Connections (QtocLstNetCnn). (I’ve listed the APIs here for completeness, but will not review them in this blog.)
With Netstat, you can find established connections by the remote IP address and local port number. You can then find the jobs associated with that connection. Note if you have a two- or three-tier application, you may discover the remote IP address is the same for many connections.
When you are in the main IPv4 Connection Status display, you need to locate the desired connection using the combination of remote IP address and local port, then
you can view jobs for that connection with option 8. Once you’ve found the job of interest, you can then work with that job.
It’s my opinion that finding a specific connection in the character-based interface is cumbersome. First, the User column shows the job user profile, not the job’s current user profile; then you need to use various function keys for finding and positioning to the information:
- F13 allows you to select what column to sort on; the default sort order is remote IP address.
- F14 toggles between local port names and local port numbers. By default, Netstat Connections displays local port names.
- F15 allows you to subset the connection list. You can specify ranges for both the local IP address and port as well as the remote IP address and port.
- F17 allows you to position to a desired remote IP address in the list.
- F16 allows you to repeat the position to—it returns you to the previous remote address you last positioned to.
You can also use Navigator for i to review IPvx connections: Network → TCP/IP Configuration → IPvx → IPvx Connections. The information displayed by Navigator is similar to the Netstat character-based interface. The GUI includes the Associated User Profile column in the main panel, but like the character interface, that’s the job user profile and is not very useful for prestart jobs. The default sort order appears to be by Local Address, although I prefer the green screen sort order of Remote Address. The GUI only shows the port numbers and does not have an option to toggle to the port name; again, I prefer the green screen to be able to toggle between the port name and number connections.
With Navigator, when you find the connection of interest, you right click to select various options, one of which is displaying the jobs associated with the connection.
When you display the jobs, Navigator does not include the current user by default; you need to use the Columns… dialog to add in current user. The upside is with the Columns… dialog, you can display a lot of additional information on the Jobs for Connection panel. Remember that table customizations are saved, so you only have to do it once.
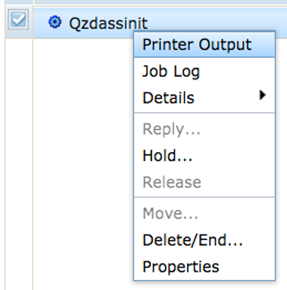
Once you locate the job, you will find Work Management options to work with that job. These options are not the full set of options displayed when starting Active Jobs, but rather a subset, similar to the options you see when displaying Server Jobs.
Both the Netstat green screen interface and the Navigator GUI are a bit cumbersome to use, simply because there can be a lot of data to filter through. In general, I prefer the GUI over the green screen due to better searching, sorting, and filtering options. However, there’s a third option that’s much better: IBM i Services.
IBM has an example service where you can display the jobs associated with an IP address. This isn’t part of the ACS Insert from Examples, but rather, one of the example from the QSYS2.SERVICES_INFO service.
The following select statement will display all the communications services and the examples provided:
SELECT * FROM QSYS2.SERVICES_INFO WHERE SERVICE_CATEGORY = ‘COMMUNICATION’;
For the NETSTAT_JOB_INFO service name, you’ll find the following example:
— Description: Review the network jobs coming in from a unique IP address
WITH NETSTAT_USER_JOBS (V_JOB_NAME, V_LOCAL_PORT) AS (
SELECT JOB_NAME, LOCAL_PORT_NAME FROM QSYS2.NETSTAT_JOB_INFO
WHERE REMOTE_ADDRESS = ‘9.10.213.27’ )
SELECT AUTHORIZATION_NAME, V_JOB_NAME, V_LOCAL_PORT,
RUN_PRIORITY, CPU_TIME, SERVER_TYPE
FROM NETSTAT_USER_JOBS,
TABLE(QSYS2.ACTIVE_JOB_INFO()) B
WHERE JOB_NAME = V_JOB_NAME;
It returns results similar to this:

What I like about these IBM i services is that you have the ability to be selective in what you want returned. You can craft SQL statements that combine services, which is what the above example has done; it uses QSYS2.NETSTAT_JOB_INFO to find the jobs associated with the specified IP address, then uses that information for the QSYS2.ACTIVE_JOB_INFO service to return basic information about those jobs. This SQL statement can be easily extended to return more information from the QSYS2.ACTIVE_JOB_INFO service. In addition, with the recent enhancements to ACTIVE_JOB_INFO, there’s a tremendous amount of detailed information you can get for jobs with this service.
In my opinion, IBM i Services provide the best solution for reviewing job information when the starting point is the remote IP address.