Simplify PowerVC Installations by Installing the PowerVC Appliance

Installing PowerVC has never been easier than with the new PowerVC appliance. Introduced with PowerVC 2.3.2, the PowerVC Virtual Appliance (PVCVA) packages all of the required software components into a single deployable image. Instead of manually installing and configuring each component, the appliance comes pre-configured and pre-tested, making PowerVC quicker and easier to deploy while providing a consistent, standardized installation experience.
PowerVC Virtual Appliance Architecture
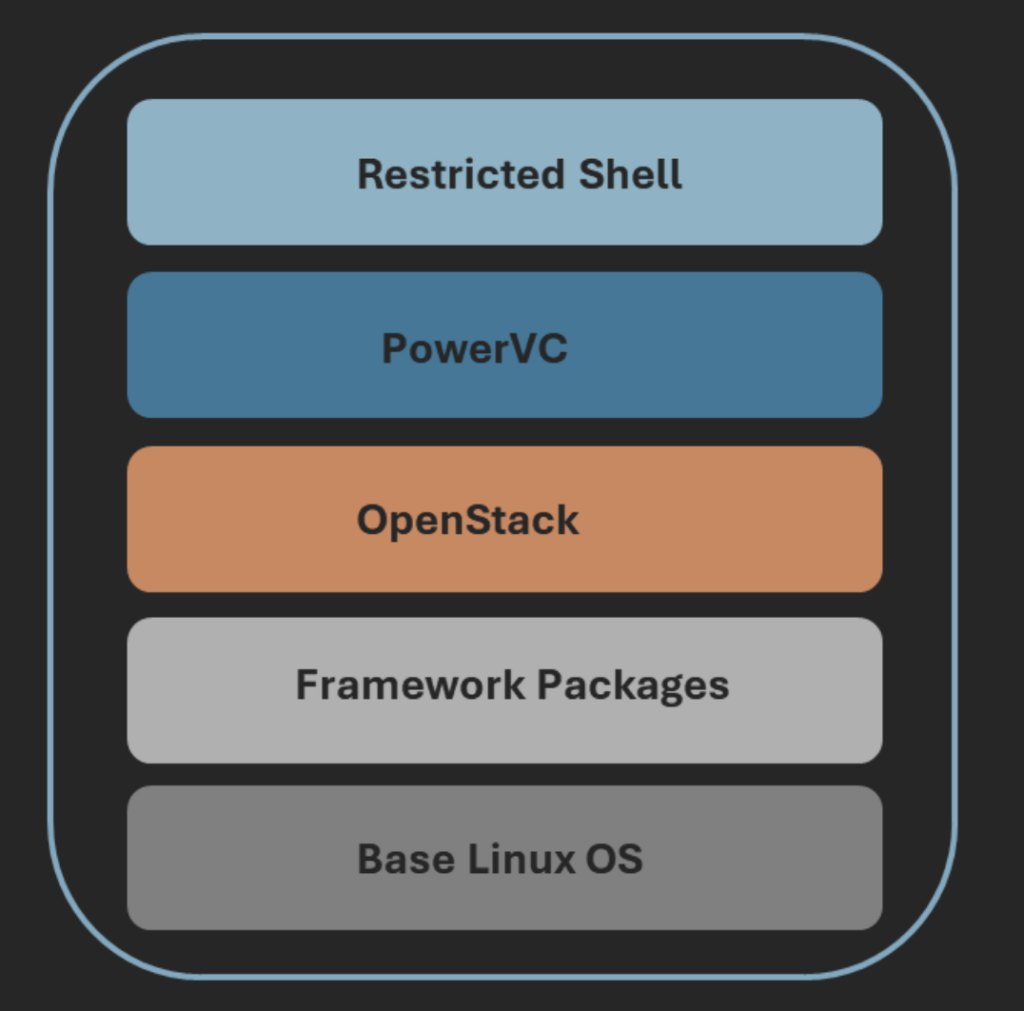
The PVCVA is a pre-built, deployable appliance delivered as an ISO image. It includes the RHEL 8.10 operating system, all required supporting software, OpenStack packages and the PowerVC application. This eliminates the need to install and configure these components separately. The appliance also includes the Linux kernel, high availability components, and a restricted shell to provide a secure, controlled management environment. IBM manages the operating system, software updates, and security fixes as part of the appliance. The diagram below shows the high-level architecture of the PVCVA.
Preparing to Install the PowerVC Virtual Appliance
In this article I’ll walk through how to install the PVCVA using a virtual optical device mapped to a Virtual I/O Server (VIOS) and a virtual media library (VML). Version 2.3.3 is shown in the examples that follow.
The first step is to download the PVCVA ISO image from the IBM ESS website, http://www.ibm.com/servers/eserver/ess/index.wss. You’ll find the package under Software Downloads, 5765-CBA Private Cloud Edn with AIX 7, 2330: Private Cloud Sub 2330 v02.03.03,ENU,DVD, ISO, and the selecting ESD-PowerVC v2.3.3 appliance (6/2026) (see image below). Note that these selections were correct at the time of writing this article; they will change as new release images of the PVCVA become available.

Once the ISO has been downloaded, copy the ISO to your VIOS VML. Copy it to /var/vio/VMLibrary. In the example below the ISO image, named PowerVC_v2.3.3_appliance.iso, was copied to the VML.
[padmin@sys901-vios1]$ ls -ltr /var/vio/VMLibrary/PowerVC_v2.3.3_appliance.iso
-r--r--r--    1 root     system   4462049280 Jul 06 23:54
/var/vio/VMLibrary/PowerVC_v2.3.3_appliance.iso
Refer to the boot virtual machine by using vOPT documentation for more details.
The next step is to define a new logical partition (LPAR) profile on a Power server for the PVCVA. The hardware and software requirements page makes it very clear what the minimum requirements are for the LPAR (see below).
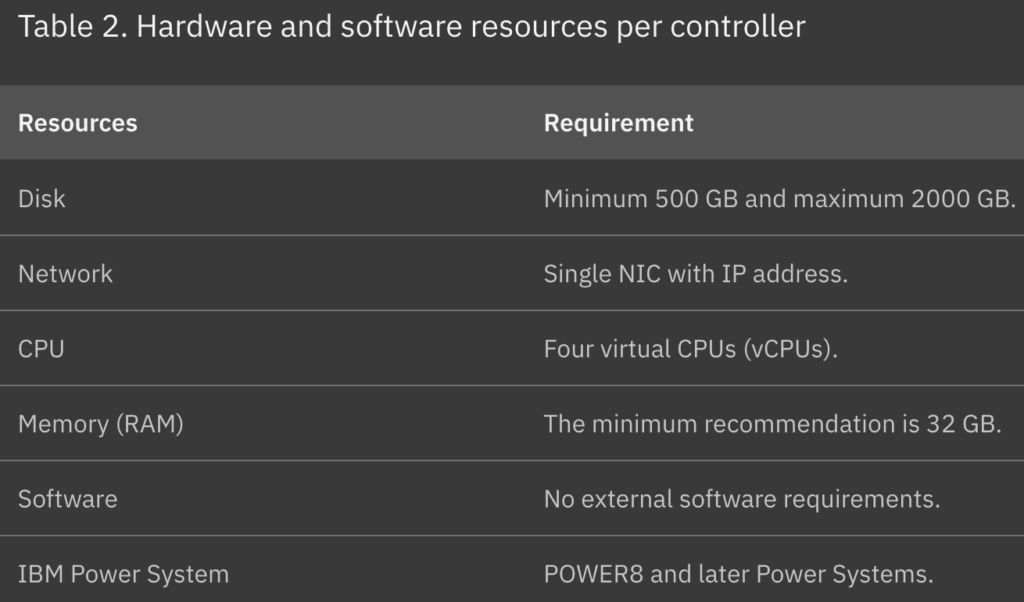
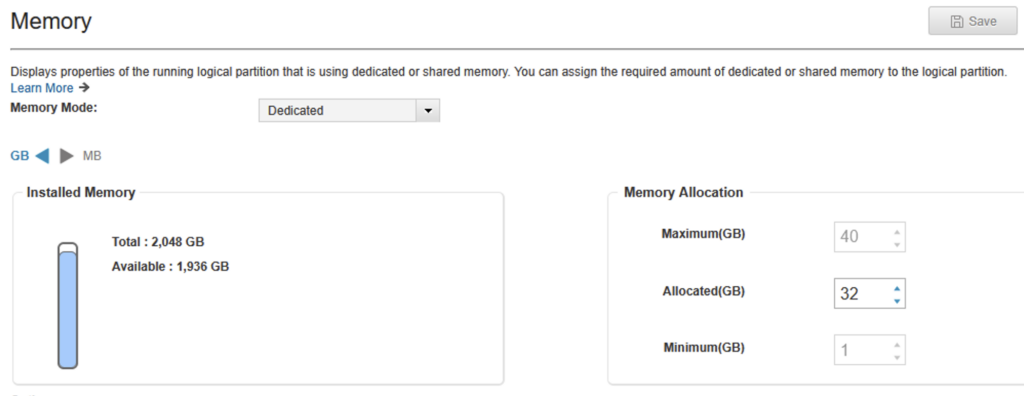
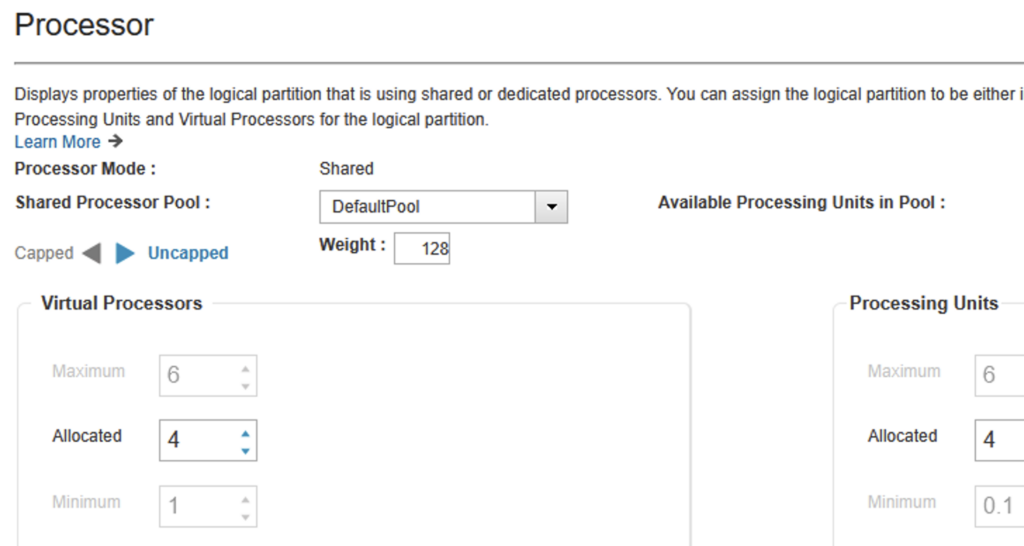
We configured a new LPAR with 32GB of memory, four virtual processors and 600GB of virtual storage. Given that we are installing the PVCVA from an ISO image, we also configured a virtual optical device for the LPAR. Here are some of the details we chose to define for the LPAR on our Power9 server (shown below).

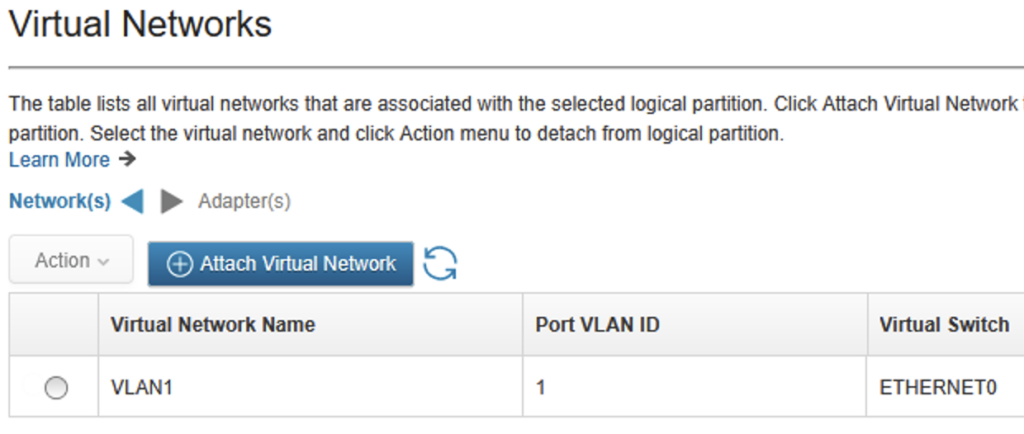
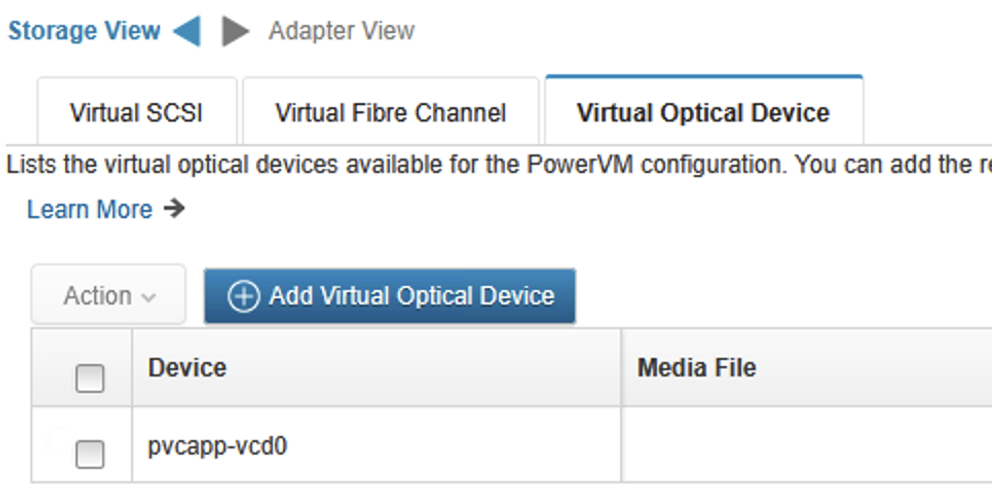
With the LPAR now defined, we also loaded the PVCVA ISO image into the virtual optical device (see image below).
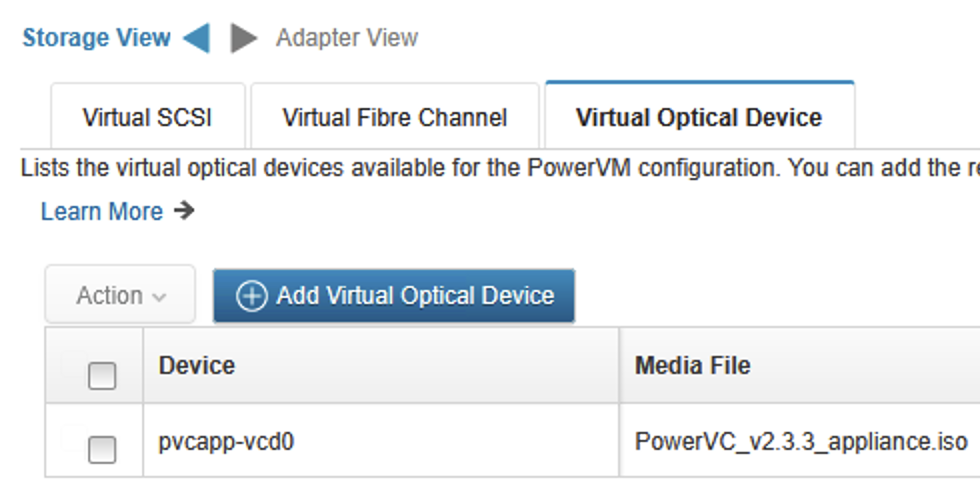
We also confirmed the ISO image (PowerVC_v2.3.3_appliance.iso) was loaded into the vOPT device (pvcapp-vcd0) by using the lsrep and lsvopt commands as the padmin user on our VIOS.
[padmin@sys901-vios1]$ lsrep | grep app
PowerVC_v2.3.3_appliance.iso         4256 pvcapp-vcd0     ro
[padmin@sys901-vios1]$ lsvopt | grep app
pvcapp-vcd0     PowerVC_v2.3.3_appliance.iso             4256
Installing the PowerVC Virtual Appliance
With the LPAR now ready, we could now install the appliance. All we needed to do was boot the LPAR from the virtual CD device (from the LPAR System Management Services, SMS, menu) and follow the prompts from the PowerVC appliance installer menus.
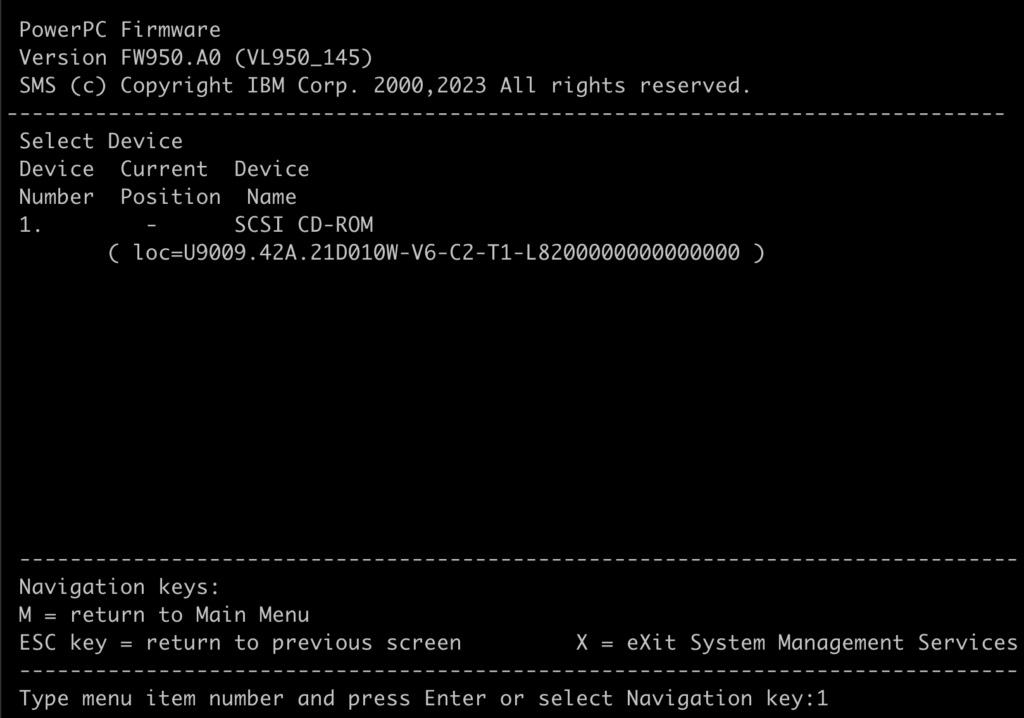
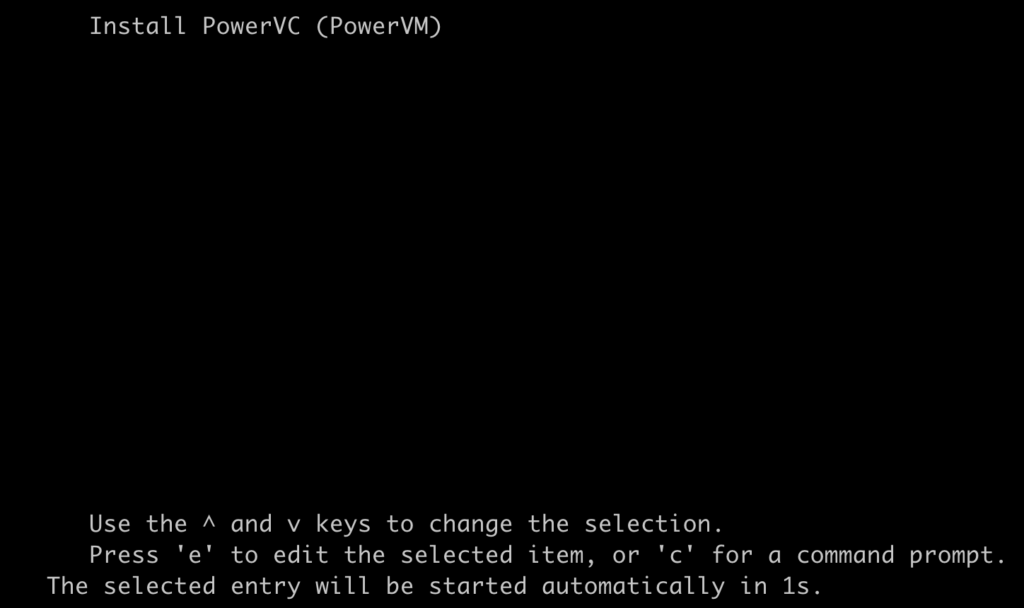
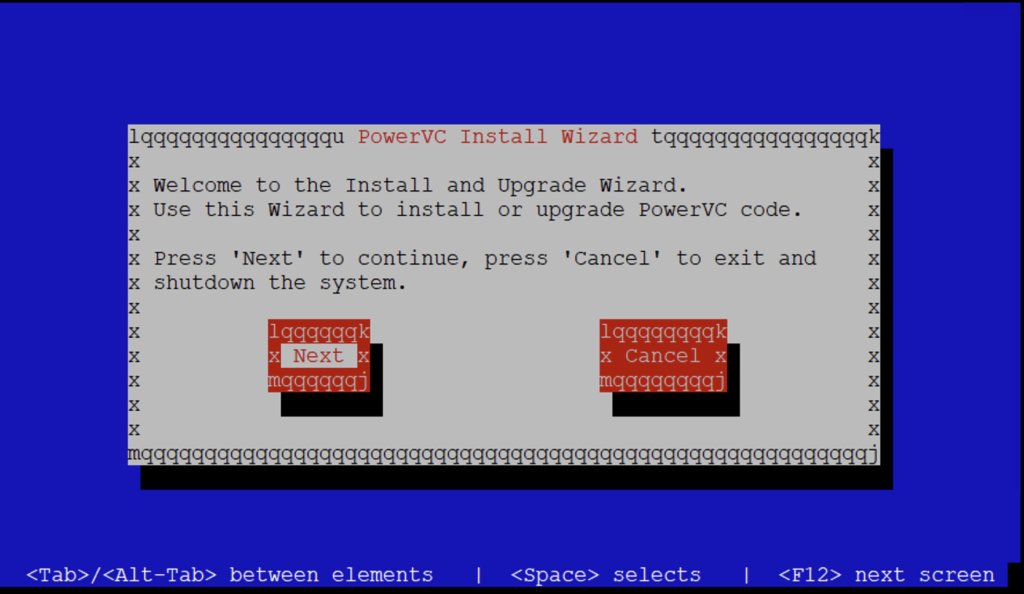
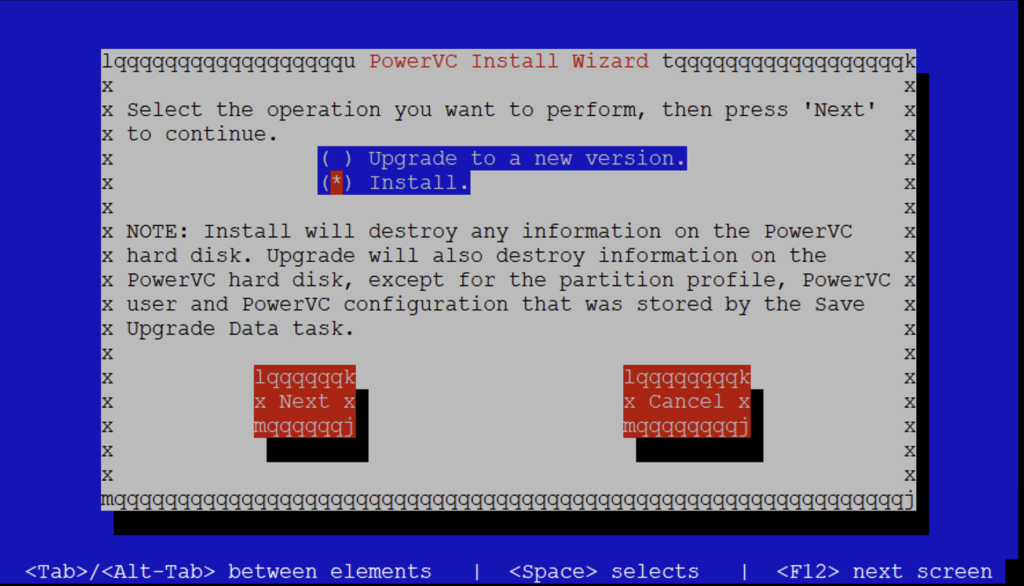
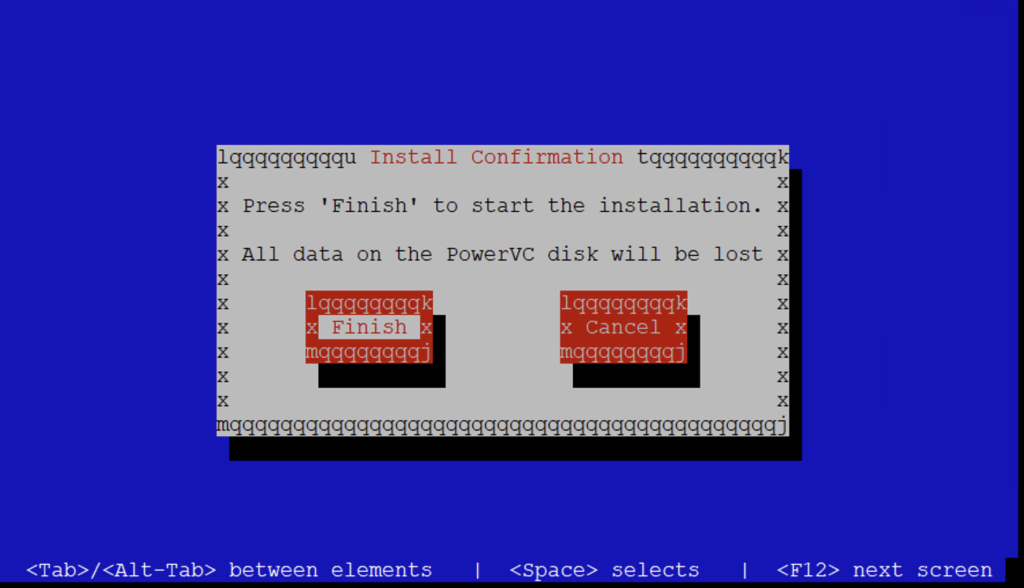
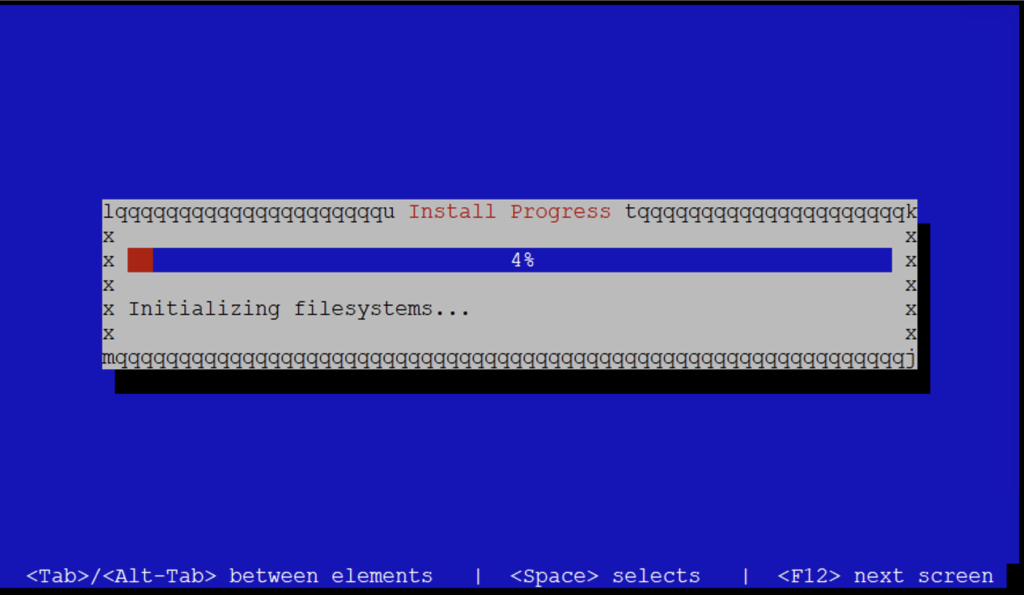
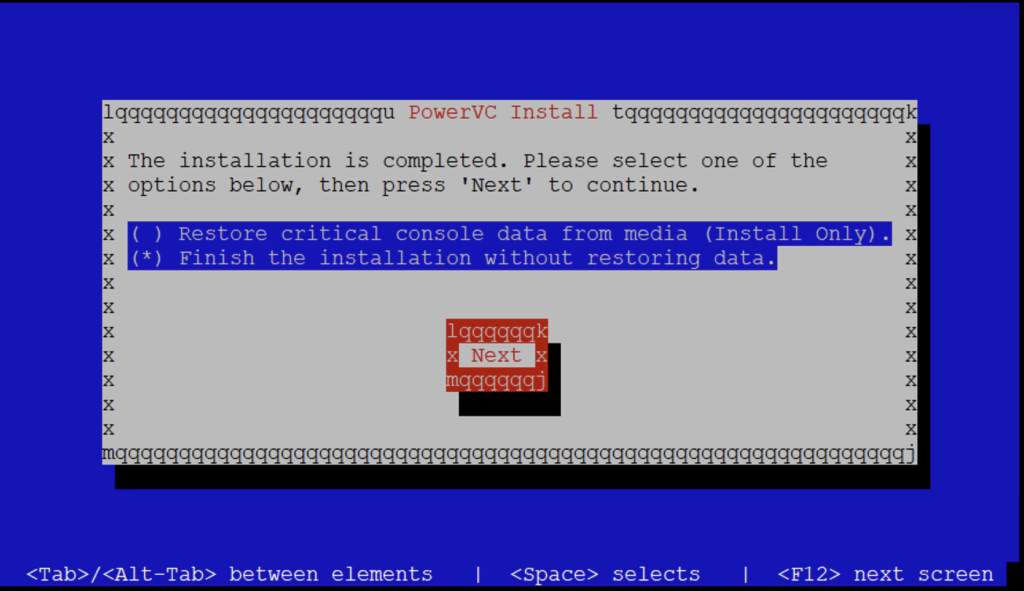
The LPAR reboots at this point.
PowerVC Virtual Appliance Post Install Configuration
The login prompt was displayed when the installation was complete and the LPAR had restarted. We then logged into the LPAR as the pvcroot user, with the default password of abcd1234.
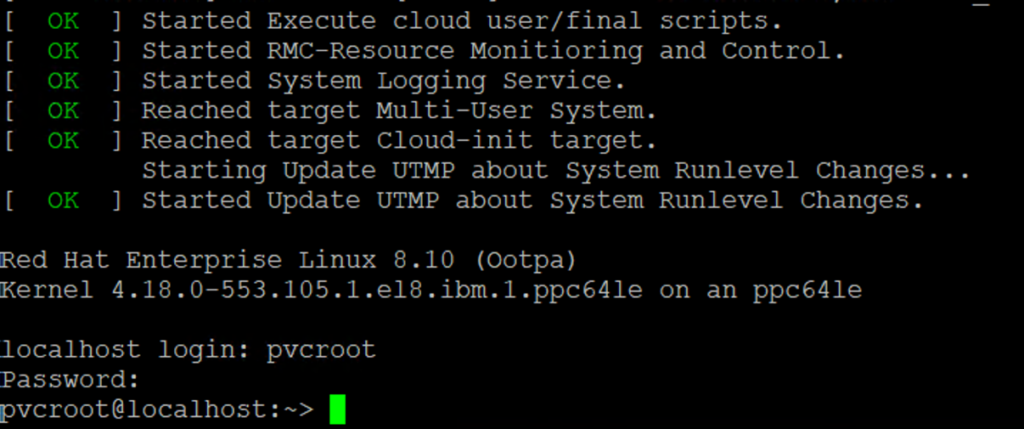
The installer automatically configures the necessary filesystems for the PowerVC environment. The filesystems defined by the appliance installer are shown below using the both the df and the new lspvcfs list-filesystems commands.
pvcroot@pvcapp:~> df -H
Filesystem                         Size  Used Avail Use% Mounted on
devtmpfs                            18G     0   18G   0% /dev
tmpfs                               18G   55M   18G   1% /dev/shm
tmpfs                               18G   51M   18G   1% /run
tmpfs                               18G     0   18G   0% /sys/fs/cgroup
/dev/sda2                           26G  8.5G   16G  36% /
/dev/mapper/PowerVCDataVG-DumpLV    27G   37k   25G   1% /dump
/dev/mapper/PowerVCDataVG-ExtraLV   21G   25k   20G   1% /extra
/dev/mapper/PowerVCDataVG-LogLV     64G   60M   60G   1% /powervclog
/dev/mapper/PowerVCDataVG-DataLV   106G  2.9G   97G   3% /powervcdata
/dev/sda3                           13G  522M   12G   5% /var
/dev/mapper/PowerVCDataVG-HomeLV   316G   41k  300G   1% /powervchome
tmpfs                              3.5G     0  3.5G   0% /run/user/1132
tmpfs                              3.5G     0  3.5G   0% /run/user/1131
tmpfs                              3.5G     0  3.5G   0% /run/user/1114
/dev/loop0                         6.5G   75M  6.4G   2% /srv/node/partition1
tmpfs                              3.5G     0  3.5G   0% /run/user/0
pvcroot@pvcapp:~> lspvcfs list-filesystems
filesystem=/powervchome,filesystem_size=301291,filesystem_avail=285915,file
s_start_time=none,files_size=0
filesystem=/dump,filesystem_size=25027,filesystem_avail=23731,files_start_t
ime=none,files_size=0
filesystem=/extra,filesystem_size=19987,filesystem_avail=18947,files_start_
time=none,files_size=0
filesystem=/powervcdata,filesystem_size=100221,filesystem_avail=92343,files
_start_time=03/04/2019 22:06:33,files_size=2591
filesystem=/powervclog,filesystem_size=60168,filesystem_avail=56904,files_s
tart_time=07/07/2026 05:43:14,files_size=145
We could confirm the PowerVC version using the lspvc list-powervc-version command. And of course, we could verify the RHEL version by displaying the /etc/redhat-release file.
pvcroot@pvcapp:~> lspvc list-powervc-version
name=IBM PowerVC
version=2.3.3
build=20260604-1115
oem=no
install-date=2026-07-07
cluster=pvcapp
install_method=cluster
pvcroot@pvcapp:~> cat /etc/redhat-release
Red Hat Enterprise Linux release 8.10 (Ootpa)
With the appliance installed successfully, the next step is to configure networking. This was pretty easy in the restricted shell of the appliance using the new chpvc command. In the example below we configure a single network interface, eth0, with an IP address of 10.8.12.82, a netmask of 255.255.255.0 and a gateway address of 10.8.12.245.
chpvc network add --interface eth0 --ip 10.8.12.82 --netmask 255.255.255.0 --gateway 10.8.12.254
Sample output shown below:
pvcroot@pvcapp:~> chpvc network add --interface eth0 --ip 10.8.12.82 --netmask 255.255.255.0 --gateway 10.8.12.254
Connection successfully activated (D-Bus active path: /org/freedesktop/NetworkManager/ActiveConnection/6)
+-------------------------------------------------------------------------+
   INFO
        Configured System eth0 with 10.8.12.82/24, gateway=10.8.12.254
+-------------------------------------------------------------------------+
|                          *** End of chpvc network ***
|
+-------------------------------------------------------------------------+
If this command fails the first time, we found that restarting the network manager should allow the command to be run successfully on a subsequent attempt (that is, systemctl restart NetworkManager).
Next we set the hostname for the PVCVA LPAR, which in our example is pvcapp.
chpvc hostname modify pvcapp
Sample output shown below:
pvcroot@localhost:~> chpvc hostname modify pvcapp
+-------------------------------------------------------------------------+
   INFO
        Hostname changed to 'pvcapp'.
+-------------------------------------------------------------------------+
|                         *** End of chpvc hostname ***
|
+-------------------------------------------------------------------------+
In our lab environment we have no DNS, so we added an entry to the hosts file for the virtual IP address, of the virtual PowerVC host (pvcappvip). And we confirmed that the entry was made to the hosts file by displaying the file.
chpvc update_dns add --entry "10.8.12.83 pvcappvip.ibm.edu  pvcappvip"
cat /etc/hosts
Sample output shown below:
pvcroot@pvcapp:~> chpvc update_dns add --entry "10.8.12.83 pvcappvip.ibm.edu  pvcappvip"

+-------------------------------------------------------------------------+
   INFO
        Added '10.8.12.83 pvcappvip.ibm.edu  pvcappvip' to file
+-------------------------------------------------------------------------+
|                        *** End of chpvc update_dns ***
|
+-------------------------------------------------------------------------+
pvcroot@pvcapp:~> cat /etc/hosts
127.0.0.1   localhost localhost.localdomain localhost4 localhost4.localdomain4
::1         localhost localhost.localdomain localhost6 localhost6.localdomain6
10.8.12.82      pvcapp pvcapp
10.8.12.83   pvcappvip.ibm.edu   pvcappvip
We observed that as soon as the network was configured on the appliance, RMC was immediately active for the LPAR. There was no need to perform any extra (manual) steps to install the necessary RSCT filesets from a (manually configured) yum/dnf repository.

Configuring PowerVC
Now for the most important step. We created the inventory and configured the virtual machine for PowerVC using the powervc-opsmgr command. If you’ve ever installed PowerVC in the last few years, this will look very familiar to you. We first generated an inventory file that PowerVC could use for its configuration specifics. Then we performed the configuration of PowerVC using the generated inventory file. See below for an example.
powervc-opsmgr inventory -c pvcapp
powervc-opsmgr configure -c pvcapp
Sample output shown below:
pvcroot@localhost:~> powervc-opsmgr inventory -c pvcapp

...etc...

Press Enter to continue viewing the license agreement, or enter "1" to accept the agreement, "2" to decline it, "3" to print it, "4" to read non-IBM terms, or "99" to go back to the previous screen.
+-------------------------------------------------------------------------+
|                               PowerVC Inventory
|
+-------------------------------------------------------------------------+
   PowerVC Nodes
        Enter the number of nodes           : 1
+-------------------------------------------------------------------------+
   INFO:
     Primary/Bootstrap Node
        * First node specified will be considered as primary or bootstrap node.
+-------------------------------------------------------------------------+
   PowerVC Node(s) Information
     Node 1
        Enter IP/Hostname for Node 1        : 10.8.12.82
        Enter Username for all nodes        : pvcroot
        Enter Password for all nodes        :
+-------------------------------------------------------------------------+
   Virtual IP
        Enter Virtual IP                    : 10.8.12.83
...etc...

pvcroot@localhost:~> powervc-opsmgr configure -c pvcapp

PLAY [PowerVC Configuration] ***************************************************

Thursday 09 July 2026  01:03:04 +0000 (0:00:00.133)       0:00:00.133 *********

TASK [Gathering Facts] *********************************************************
ok: [10.8.12.82]
Thursday 09 July 2026  01:03:05 +0000 (0:00:01.527)       0:00:01.660 *********
ok: [10.8.12.82]
...etc...
In our example the configure step completed successfully. This step takes a while to run (about 20 minutes or so).
At the end of the configure process we saw the message “Access PowerVC UI at https://10.8.12.83”, indicating that our newly installed PowerVC server is ready for use.
...
Tuesday 07 July 2026  06:48:13 +0000 (0:00:00.055)       0:26:21.189 **********
===============================================================================
powervc_gnocchi : restart ceilometer services -------------------------- 91.81s
powervc_health : Wait for openstack health API services to stop -------- 63.77s
...etc...
powervc_synchronize_configurations : Set sync variables based on component -- 13.79s
IBM PowerVC configuration successfully completed at 2026-07-07 06:48:13.
 Refer to
 /powervclog/opsmgr/artifacts/powervc-opsmgr_pvcapp_configure_20260707_062149/stdout
 for more details.
Access PowerVC UI at https://10.8.12.83
+-------------------------------------------------------------------------+
|                        *** End of PowerVC Inventory ***
|
+-------------------------------------------------------------------------+
pvcroot@pvcapp:~>
We could then display the PowerVC configuration inventory using the powervc-opsmgr command.
pvcroot@pvcapp:~> powervc-opsmgr inventory -l
+-------------------------------------------------------------------------+
|                           PowerVC Inventory - pvcapp
|
+-------------------------------------------------------------------------+
        Cluster Name              : pvcapp
        Cluster ID                : 21989648-c5d9-4b6c-b838-38e6d04634d2
        Mode                      : Appliance
        Virtual IP                : 10.8.12.83
        Primary/Bootstrap Host    : 10.8.12.82
        Hosts                     : 10.8.12.82
        Edition                   : private_cloud
+-------------------------------------------------------------------------+
|                   *** End of PowerVC Inventory - pvcapp ***
|
+-------------------------------------------------------------------------+
pvcroot@pvcapp:~>
Access the PowerVC Virtual Appliance UI
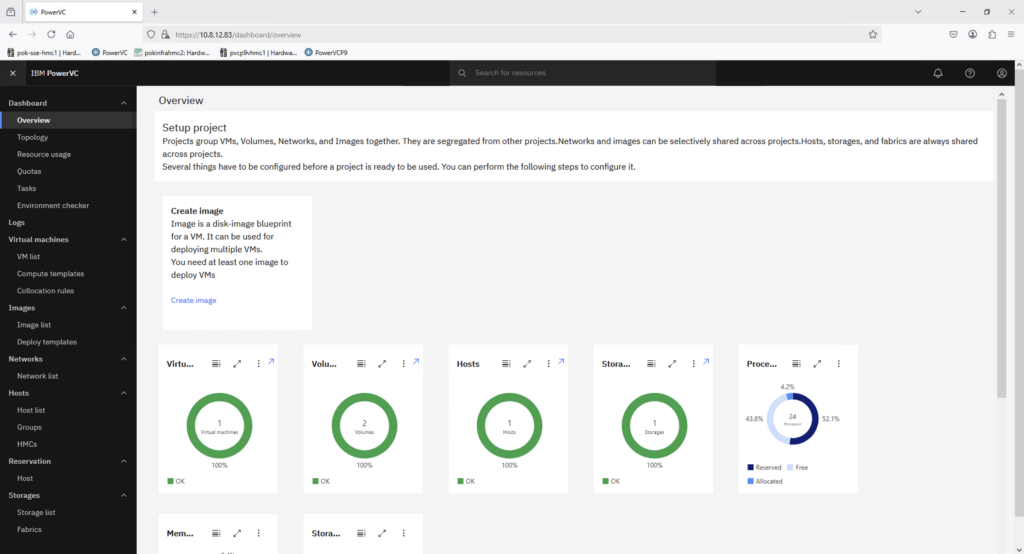
With the PowerVC server installed and running, we could now access the web user interface (UI). We found that we had to wait a few minutes, after the install, before we could connect successfully to the UI with a web browser (so please be patient). Then we were able to access the PowerVC UI and login as pvcroot (with the default password of abcd1234).
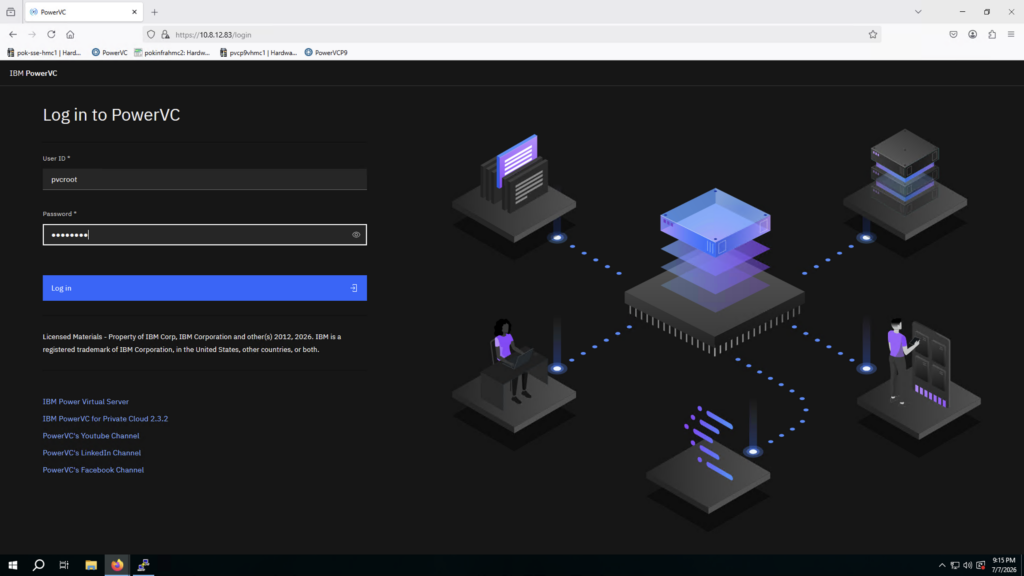
After that, everything else was pretty standard PowerVC configuration. We were able to add, with ease, an HMC, a host, a storage provider and a VM to our new PowerVC appliance. The interface felt responsive, and we had no issues performing any tasks we needed to perform.
PowerVC Virtual Appliance Commands
As you’d expect with any appliance-like installation, the command line (CLI) environment is configured with a restricted shell. The PVCVA provides a set of CLI commands for use in the restricted shell. Here a few examples.
You can list the servers (hosts) that are managed by the PowerVC server using the lspvc list-hypervisor command.
pvcroot@pvcapp:~> lspvc list-hypervisor
type=powervm
cmodel=IBM
mtype=9009
system_id=IBM,0621D010W
lpar_name=ibm_power-lpar_shared
architecture=ppc64le
We were able to create a powervcrc file using the createrc command.
createrc set OS_USERNAME=pvcroot OS_PASSWORD=abcd1234
This created a powervcrc file in the pvcroot users home directory.
pvcroot@pvcapp:~> pwd
/home/pvcrootpvcroot@pvcapp:~> cat powervcrc
export OS_PASSWORD=abcd1234
export OS_USERNAME=pvcroot
export OS_REGION_NAME=RegionOne
export OS_NETWORK_API_VERSION=2.0
export OS_USER_DOMAIN_NAME=Default
export OS_IMAGE_API_VERSION=2
export OS_PROJECT_NAME=ibm-default
export OS_PROJECT_DOMAIN_NAME=Default
export OS_IDENTITY_API_VERSION=3
export OS_AUTH_URL=https://10.8.12.83:5000/v3
export OS_COMPUTE_API_VERSION=2.46
export OS_TENANT_NAME=ibm-default
export OS_VOLUME_API_VERSION=3
export OS_CACERT=/etc/pki/tls/certs/powervc.crt
We could check the status of PowerVC services using the (standard) powervc-services command.
pvcroot@pvcapp:~> powervc-services status

+------------------------------------------------------------+------------+
| service_name                                               | 10.8.12.82 |
+------------------------------------------------------------+------------+
| clerk-api                                                  |  Started   |
+------------------------------------------------------------+------------+
| galera                                                     |  Started   |
+------------------------------------------------------------+------------+
| galera-cluster-check                                       |   Synced   |
+------------------------------------------------------------+------------+
| httpd                                                      |  Started   |
+------------------------------------------------------------+------------+
| mongod                                                     |  Started   |
+------------------------------------------------------------+------------+
| neutron-server                                             |  Started   |
+------------------------------------------------------------+------------+
| openstack-blazar-api                                       |  Started   |
+------------------------------------------------------------+------------+
...etc...
Displaying the installed PowerVC RPM packages was easy with powervcrpm.
pvcroot@pvcapp:~> powervcrpm show
libffi-3.1-24.el8.ibm.1.ppc64le
erlang-syntax_tools-26.2.5.18-ibm.1.el8.ppc64le
kmod-25-20.el8.ibm.1.ppc64le
libknet1-compress-plugins-all-1.28-1.el8.powervc.1.ppc64le
python3-cliff-tablib-2.0-1.ibm.el8.noarch
python3-pip-wheel-9.0.3-24.el8.ibm.1.noarch
less-530-3.el8_10.ppc64le
libimagequant-devel-2.16.0-2.ibm.el8.ppc64le
libwsman1-2.6.5-10.el8.ibm.1.ppc64le
...etc...
We could monitor memory usage on the PowerVC server with pvcmon -r mem.
pvcroot@pvcapp:~> pvcmon -r mem
[2026-07-08 05:15:03] Monitoring: MEM

              total        used        free      shared  buff/cache   available
Mem:           31Gi        16Gi        10Gi       401Mi       5.2Gi        14Gi
Swap:          23Gi          0B        23Gi
We could monitor processor usage on the PowerVC server, again, with pvcmon -r proc.
pvcroot@pvcapp:~> pvcmon -r proc
[2026-07-08 05:16:01] Monitoring: PROC

top - 05:16:01 up 23:44,  1 user,  load average: 0.26, 0.31, 0.27
Tasks: 601 total,   1 running, 600 sleeping,   0 stopped,   0 zombie
%Cpu(s):  0.4 us,  0.2 sy,  0.0 ni, 99.5 id,  0.0 wa,  0.0 hi,  0.0 si,  0.0 st
MiB Mem :  32639.9 total,  10496.8 free,  16798.9 used,   5344.2 buff/cache
MiB Swap:  24575.9 total,  24575.9 free,      0.0 used.  14709.8 avail Mem

    PID USER      PR  NI    VIRT    RES    SHR S  %CPU  %MEM     TIME+ COMMAND
  38381 root      rt   0  158016  91584  68160 S   5.9   0.3   8:15.47 corosync
 688661 root      20   0  229248   7680   4416 R   5.9   0.0   0:00.01 top
      1 root      20   0  178368  18240  10112 S   0.0   0.1   6:02.38 systemd
      2 root      20   0       0      0      0 S   0.0   0.0   0:00.14 kthreadd
      3 root       0 -20       0      0      0 I   0.0   0.0   0:00.00 rcu_gp
      4 root       0 -20       0      0      0 I   0.0   0.0   0:00.00 rcu_par+
      5 root       0 -20       0      0      0 I   0.0   0.0   0:00.00 slub_fl+
      7 root       0 -20       0      0      0 I   0.0   0.0   0:00.00 kworker+
      9 root       0 -20       0      0      0 I   0.0   0.0   0:00.00 mm_perc+
     10 root      20   0       0      0      0 S   0.0   0.0   0:00.00 rcu_tas+
     11 root      20   0       0      0      0 S   0.0   0.0   0:00.00 rcu_tas+
     12 root      20   0       0      0      0 S   0.0   0.0   0:00.21 ksoftir+
     13 root      20   0       0      0      0 I   0.0   0.0   0:27.95 rcu_sch+
Listing the entries in the /etc/hosts file was possible with the command chpvc update_dns show.
pvcroot@pvcapp:~> chpvc update_dns show
127.0.0.1   localhost localhost.localdomain localhost4 localhost4.localdomain4

::1         localhost localhost.localdomain localhost6 localhost6.localdomain6

10.8.12.82      pvcapp  pvcapp

10.8.12.83      pvcappvip.ibm.edu
+-------------------------------------------------------------------------+
   INFO
        Listed all entries
+-------------------------------------------------------------------------+
|                        *** End of chpvc update_dns ***
|
+-------------------------------------------------------------------------+
Listing the disk partitions was possible with the command chpvc fdisk list.
pvcroot@pvcapp:~> chpvc fdisk list
+---------------------------------------------------------------------+
   INFO
        Available partitions:
Disk /dev/sda: 600 GiB, 644245094400 bytes, 157286400 sectors
Units: sectors of 1 * 4096 = 4096 bytes
Sector size (logical/physical): 4096 bytes / 4096 bytes
I/O size (minimum/optimal): 4096 bytes / 4096 bytes
Disklabel type: dos
Disk identifier: 0x5f542626

Device     Boot    Start       End   Sectors  Size Id Type
/dev/sda1  *        2048      4095      2048    8M 41 PPC PReP Boot
/dev/sda2           4096   6291455   6287360   24G 83 Linux
/dev/sda3        6291456   9437183   3145728   12G 83 Linux
/dev/sda4        9437184 157274879 147837696  564G  f W95 Ext'd (LBA)
/dev/sda5        9438208  10485759   1047552    4G 83 Linux
/dev/sda6       10486784  13107199   2620416   10G 83 Linux
/dev/sda7       13108224  19398655   6290432   24G 8e Linux LVM
/dev/sda8       19399680 157274879 137875200  526G 8e Linux LVM
…etc…
Refer to the documentation for more examples and a complete list of available commands.
Conclusion
So, there you have it. That was certainly quickest and easiest installation of PowerVC I’ve ever performed.
There are other options available for deploying and installing the PVCVA, such as booting the virtual machine using a BOOTP server or booting the virtual machine using vOPT and cloud-init ISOs. You’ll find these documented in the PowerVC documentation under PVCVA boot up methods here: https://www.ibm.com/docs/en/powervc-cloud/2.3.3?topic=deployment-pvcva-boot-up-methods.
If you’ve ever installed an older version of PowerVC, you’ll know there were quite a few moving parts to get everything up and running. The PowerVC virtual appliance takes much of that work away by packaging everything into a single deployable image. The end result is a much simpler installation, a consistent deployment and less time spent building the environment from scratch.
We hope you found this article helpful and that it gives you a good understanding of what the PowerVC virtual appliance is, how it works and why IBM introduced it. If you’re planning to deploy PowerVC 2.3.2 or later, the virtual appliance is well worth a look.
References
Hardware and software requirements for PVCVA
Boot virtual machine by using vOPT
PowerVC Virtual Appliance ISO Installation: Simplifying Deployment for the Modern Enterprise
Announcing the release of PowerVC for Private Cloud 2.3.3
PowerVC virtual appliance (PVCVA) CLI commands
Create inventory and configure the virtual machine