ISPF for VS Code Users: Keyboard Shortcuts
New-to-Z systems engineer Stephen Johnston shows VS Code users how to assign keyboard shortcuts on z/OS
Just like in VS Code, keybindings—or Program Function (PF) keys—in ISPF aren’t static; they change for the exact same reasons they do in VS Code. There are the defaults, panels-level keybindings and your own customized keybindings.
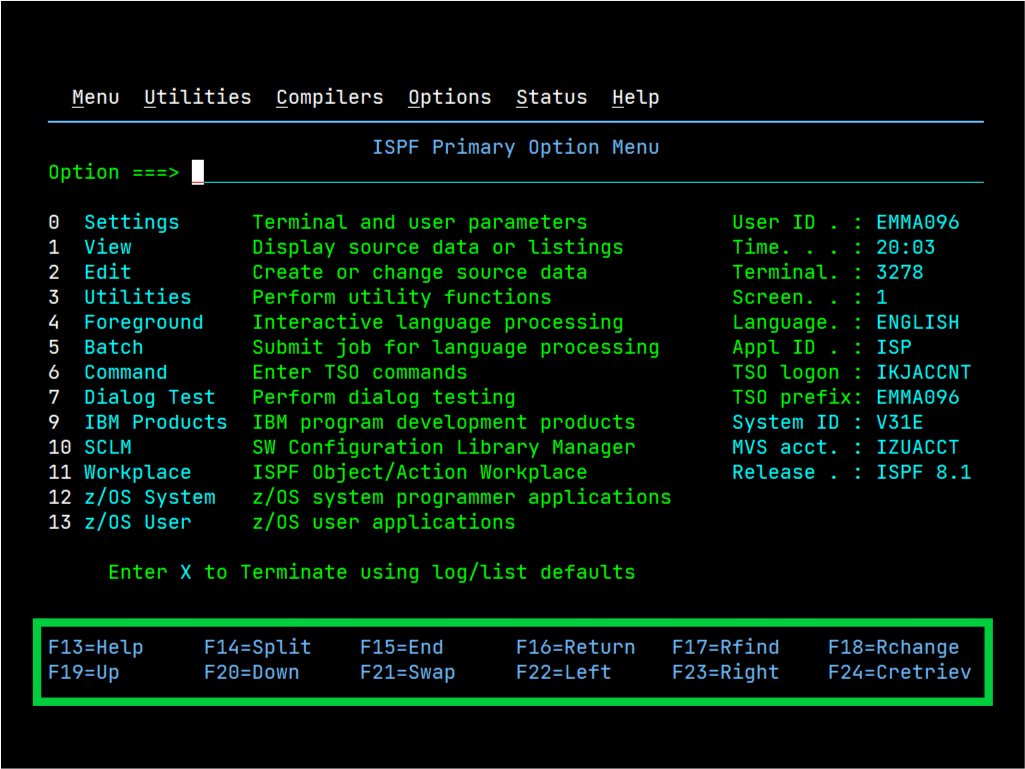
You can see an example of this below in the Figures 1-3. Note that because PF keys in z/OS can be customized, the keys shown in these screens may differ from your system. These are displayed in what is called the function key area, and if you’re just learning how to navigate ISPF, I highly recommend that you keep this information visible, even though it eats up some screen space.
However, depending on how your site is configured, it is possible that the function key area isn’t displayed.
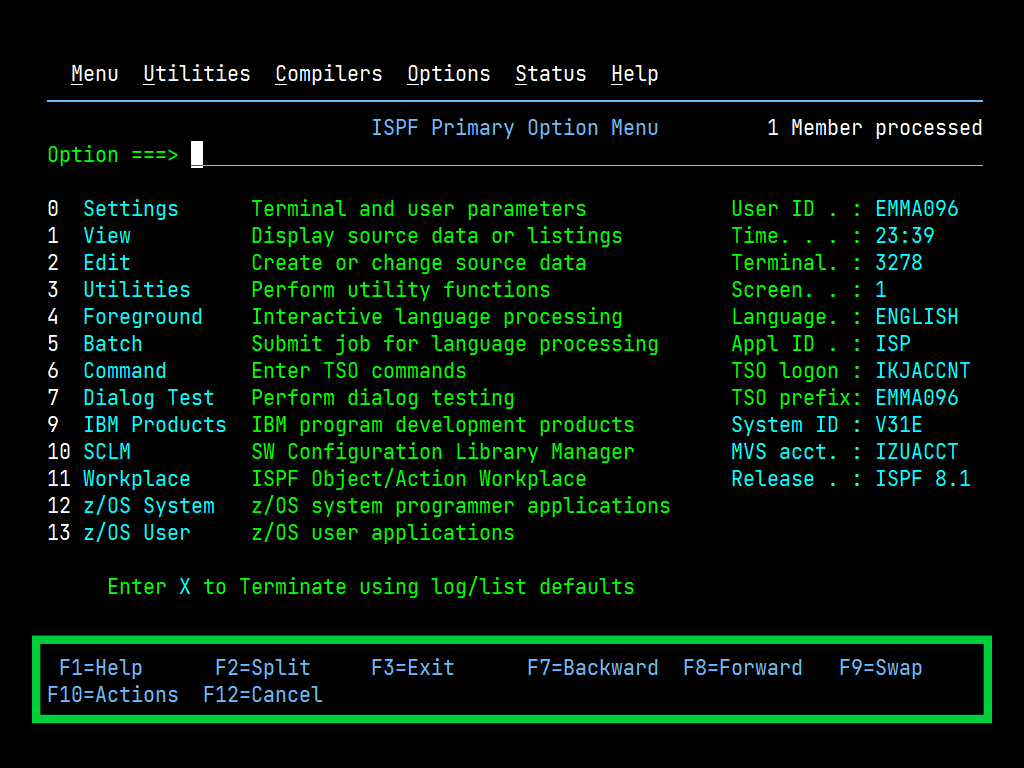
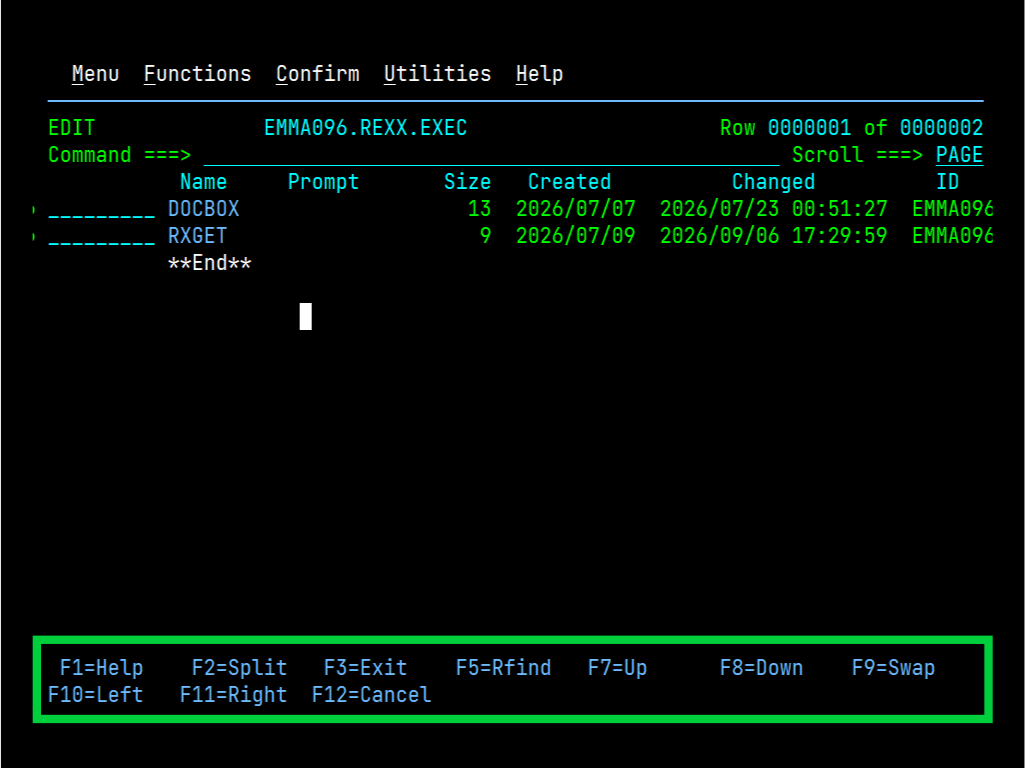
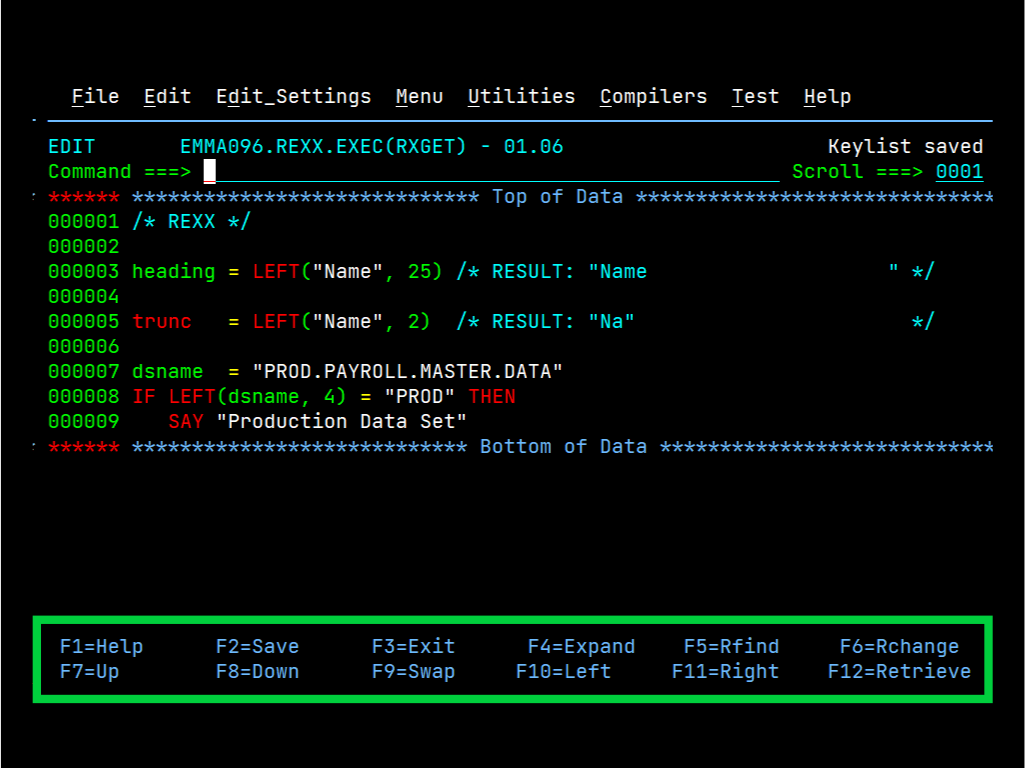
Base Keys
Just like in VS Code, how shortcuts like CTRL-C and CTRL-V are widely agreed to be the universal (or CMD+C / CMD+V on macOS) standards for copy and paste, ISPF has keys that are globally recognized to mean the same thing across almost (I’ve seen things I can’t un-see) all panels.
Table 1: Some common universal key assignments
| Key | Function | Description |
| F1 | Help | Displays a help/tutorial panel. I recommend all new-to-z users become deeply intimate with this key. |
| F3 | Exit/End | This functions as your “back” or “close” button. |
| F7 | Page Up | Scrolls the data upward. |
| F8 | Page Down | Scrolls the data downward. |
I will point out that in 3270 emulators you can also use the scroll wheel to scroll up and down, but you must be careful because sometimes, especially with a track pad, you can unintentionally cause a pretty neat “Matrix” look in long members as their lines flash by line-by-line. Ask me how I know!
The Function Key Area
In ISPF, the function key area displays your current PF key assignments at the bottom of your screen. It has two variations: the long form, which shows two rows of keys, and the short form, which shows a single line of keys. When you first log on, which variation you see depends on your profile or site settings. When you type the command to show the function key area, it will default to the long form.
The PFSHOW and FKA Commands
The PF key bar can be shown in ISPF by typing PFSHOW or its shorter, and arguably less obvious command, FKA. If you look at the documentation for both of these, they have a similar syntax, except PFSHOW has an option called TAILOR, and FKA does not.
The PFSHOW command syntax is:
PFSHOW [ON | OFF | TAILOR]
The long key list is default. When you enter the PFSHOW command with no options, or PFSHOW ON, it will display the long PF keys list.
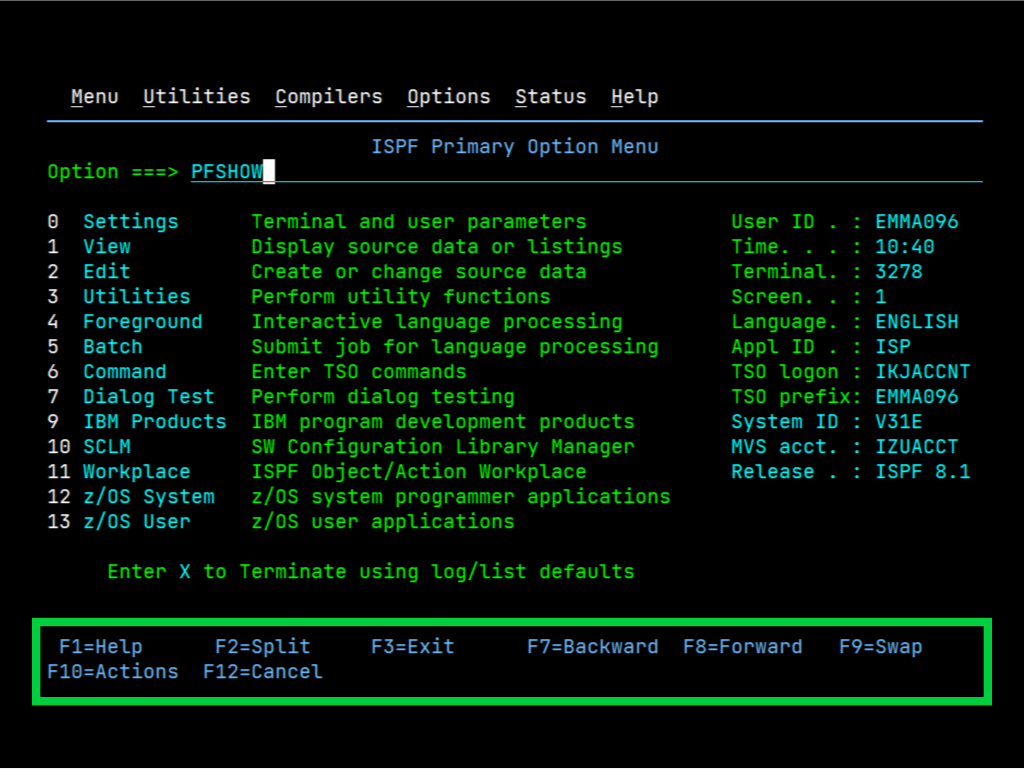
When you enter PFSHOW by itself the second time, you will see the short list.
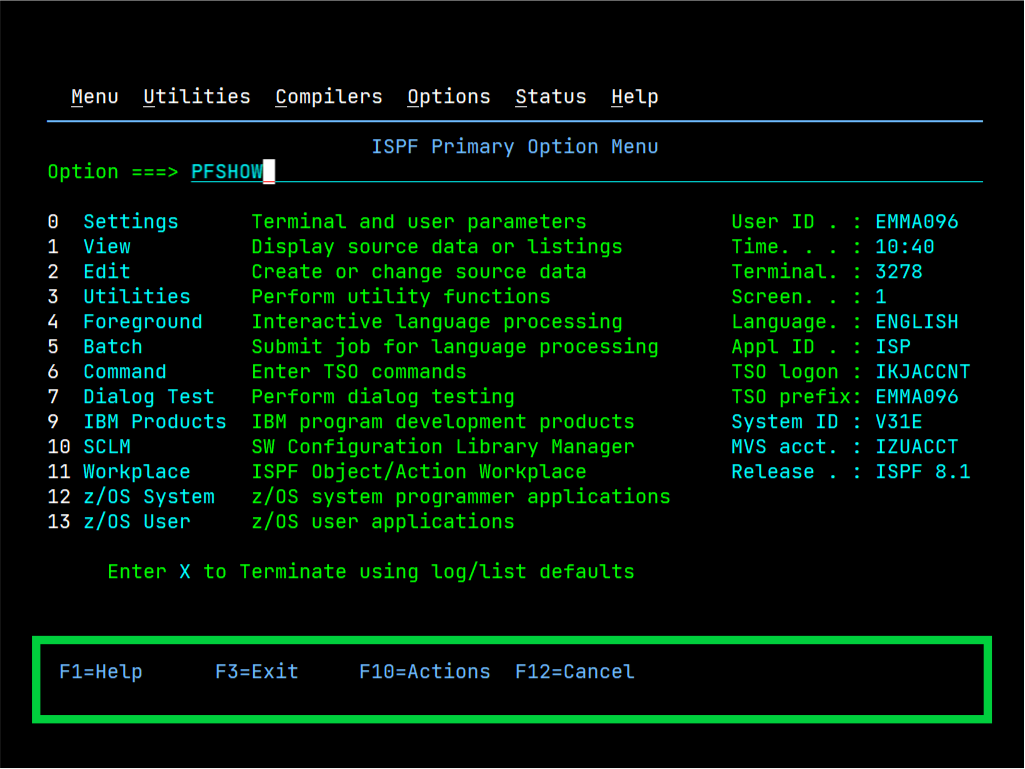
Enter PFSHOW a third time, or PFSHOW OFF, and it will remove it from the screen. Remember, since PFSHOW ON defaults to the long list, if you enter it multiple times, unlike just PFSHOW by itself, it will only show the long list.
As mentioned earlier, PFSHOW is just one command to display the list of keys. The second way is with the command FKA.
The FKA command syntax is:
FKA [ON | SHORT | OFF]
Just like PFSHOW, the long key list is default. When you enter the FKA command with no options, or FKA ON, it will display the long PF keys list.
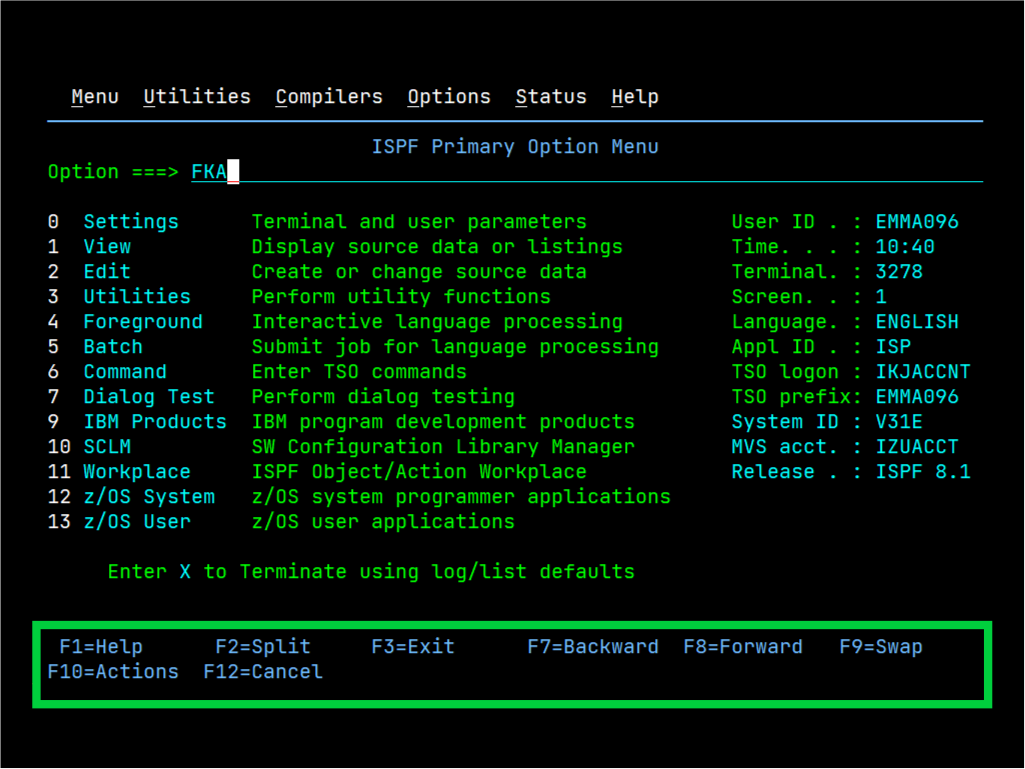
When you enter FKA by itself the second time, you will see the short list.
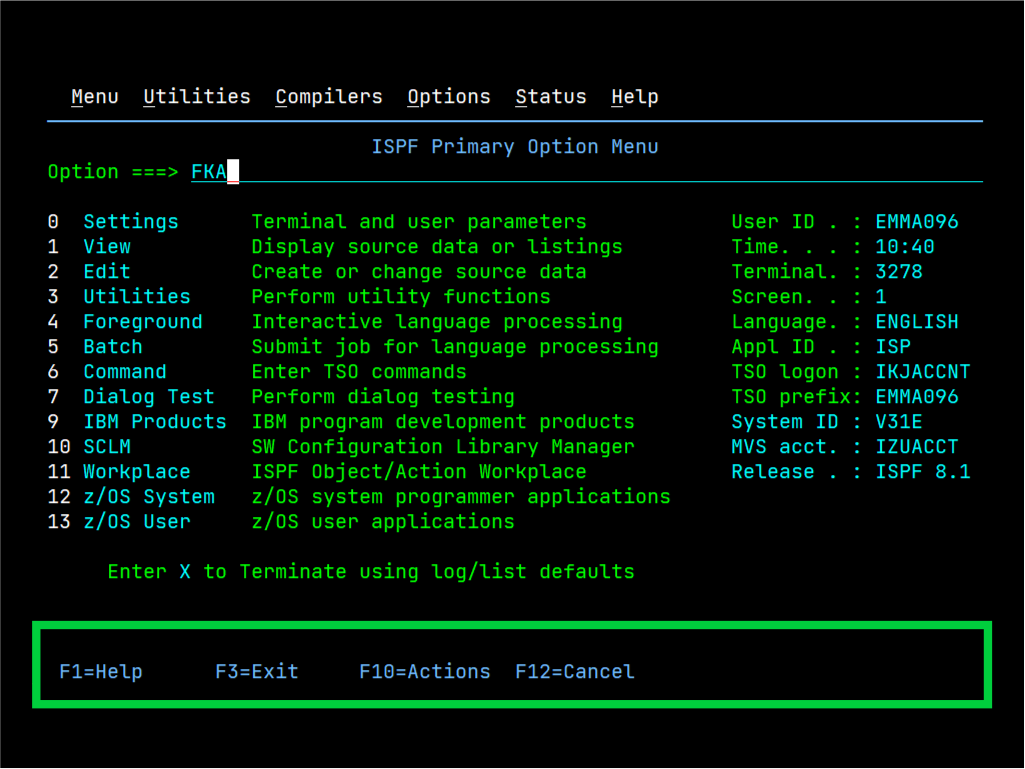
Lastly, if you really want to see the short keys list, and don’t want to mess with typing FKA or PFSHOW twice, you can enter FKA SHORT, and you guessed it, you will see the short list!
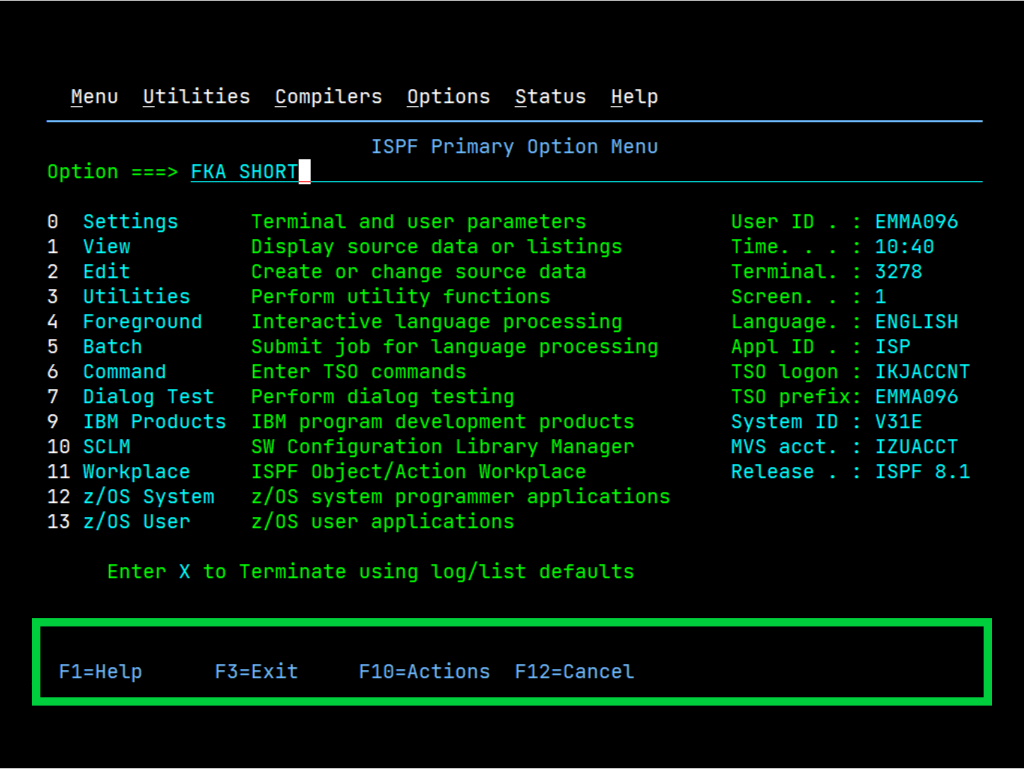
In this section, you learned how to display the short and long form key list in ISPF. In our next section, you’ll learn about the PFSHOW TAILOR.
Customizing the Layout with PFSHOW TAILOR
The PFSHOW TAILOR option allows you to change how the PF key lines are displayed when you enter the PFSHOW or FKA commands. To show this panel, enter the command PFSHOW TAILOR.
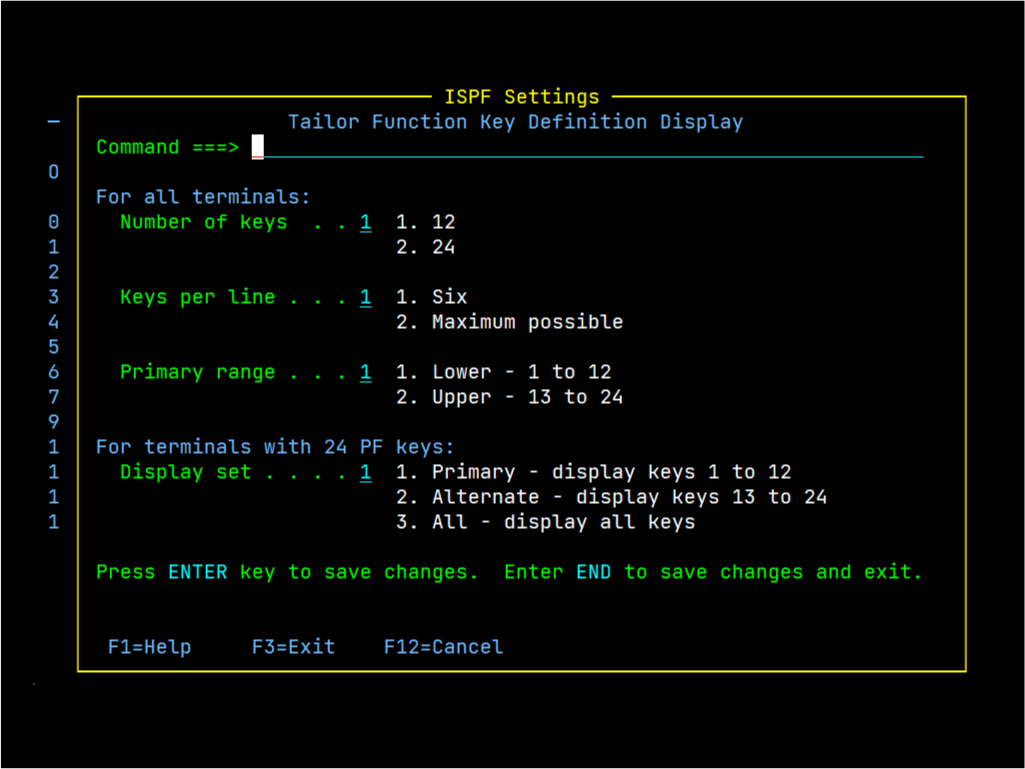
There is a lot happening this screen, so let’s tackle these fields one by one. For changes to take effect in this panel, you simply make the change, press Enter, and then F3 to close the panel (assuming you haven’t reassigned that key!). Also, in the interest of transparency, I’ve never really played around in this panel before.
Number of Keys
We have two options here: 12 and 24.
A question I had when starting out was: Why 24? And after some research I learned that while early 3270 keyboards had 12 PF keys, later models expanded this to 24 PF keys. There are actually modern manufacturers who produce 24-PF-key keyboards today, but they’re very pricey. If you feel the desire to use 24 PF keys, then I would advise taking the approach my co-worker has, and using your terminal emulator to assign keys on your number pad to those.
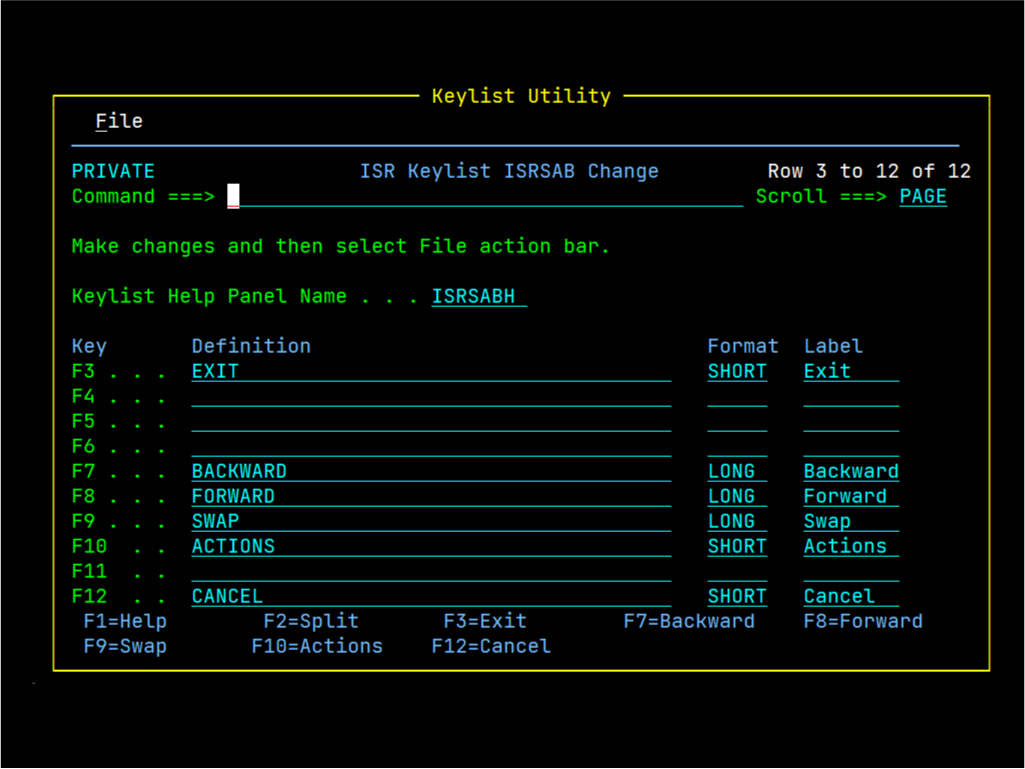
On my system 12 PF keys are the default, and this means that when I get ready to customize my keys (see Customizing Your Keys), I will see 12 rows.
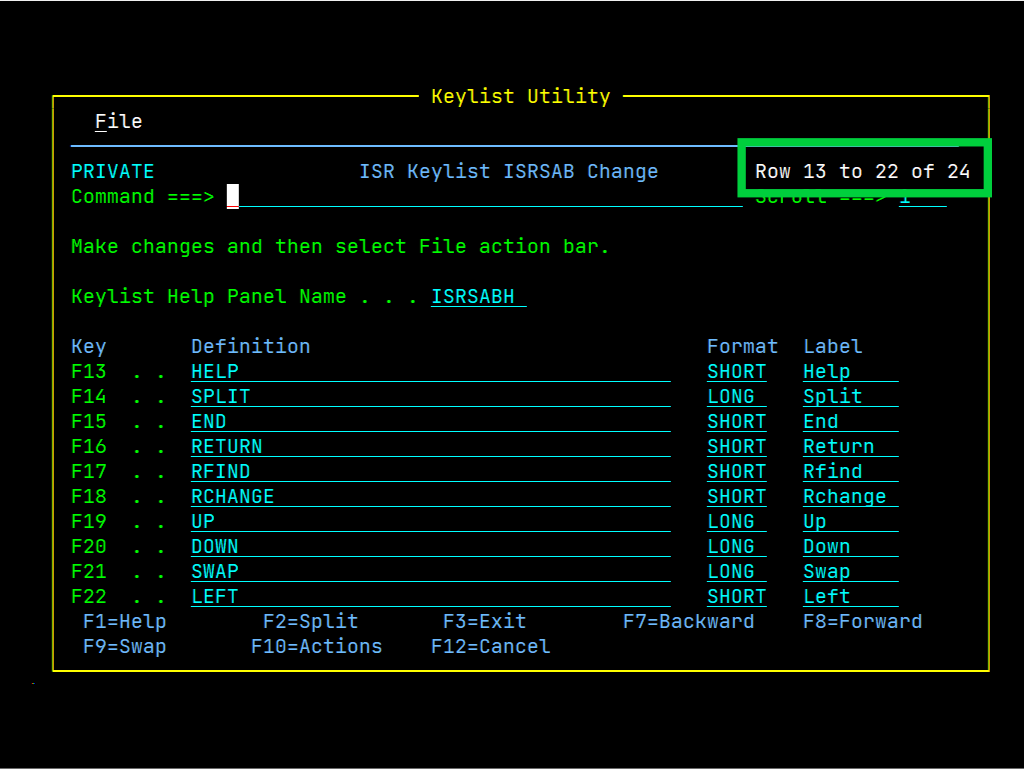
If I change this to option 2, then bring up my list of key assignments, I will see those additional 12 keys after scrolling down the list.
It’s important to note that IBM’s documentation on this panel highlights a dynamic component at play: “ISPF automatically determines the terminal type, screen size, and number of function keys.” That said, if something is off, check your settings. However, in all of the time I’ve been using my 3270 emulator, I’ve never had an issue with settings that wasn’t caused by my own curiosity, and I have also never found a need for more than 12 PF keys.
Keys per line
This setting allows you to customize how many keys will be displayed on each line in the function key area. By default, 6 is selected, and this helps maintain an uncluttered and consistent appearance across panels. The other option is Maximum, though I haven’t found documentation confirming exactly how it works under the hood.
Primary range
This allows you to specify which primary keys are shown. You have two options here:
- Lower – Primary Keys F1-12.
- Upper – Primary Keys F13-24.
The lower option is the default selection.
Display set
If you’ve got 24 keys, you can choose what to show: primary (F1-F12, the default), alternate (F13-F24), or all of them at once (which seems overwhelming). Whichever range you picked as “primary” earlier decides what “primary” means here. On a 12-key terminal, this doesn’t apply to you so … just skip it.
Customizing Your Keys
Before we get into this, it’s important to know that PF key customization is specific to the panel you’re on. This can be a bit frustrating if you, like me, switch between multiple environments and forget to re-assign the F2 key in ISPF Edit, and you split the screen instead of saving your member.
In VS Code you have a LOT of keys that you customize. But as we’ve already hit on, in ISPF, you’ve got 12 to 24.
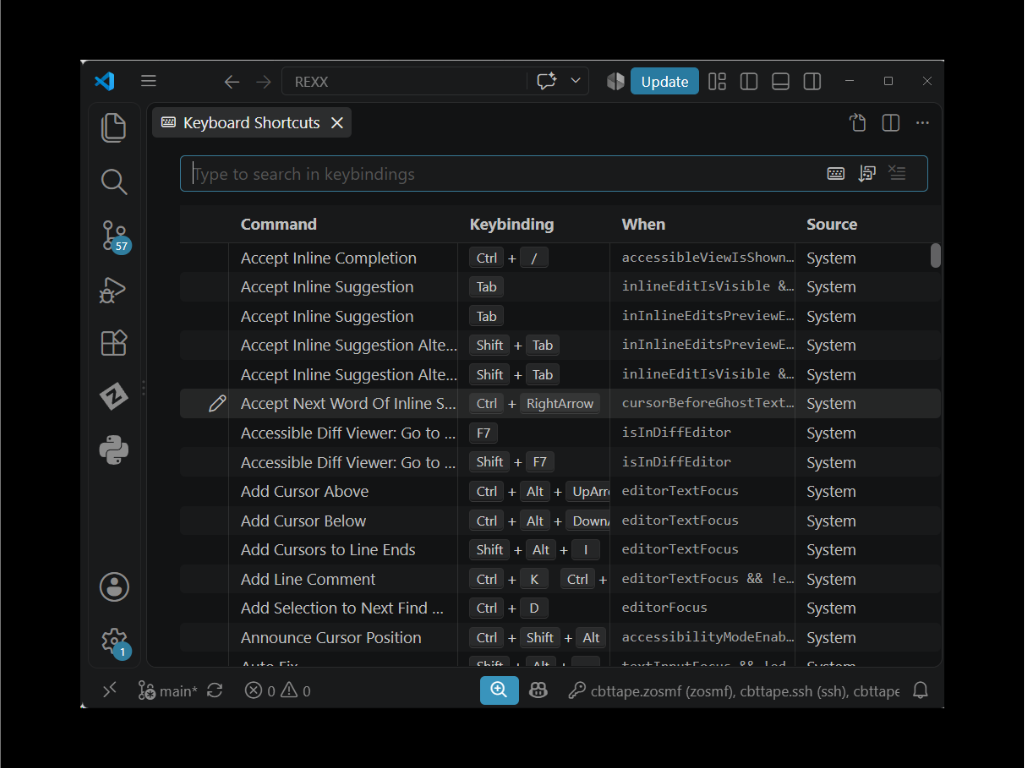
Figure 13. VS Code keybinding settings.
We can customize the keys for a panel by typing the command KEYS (no options) and pressing Enter. This brings up the Keylist Utility.
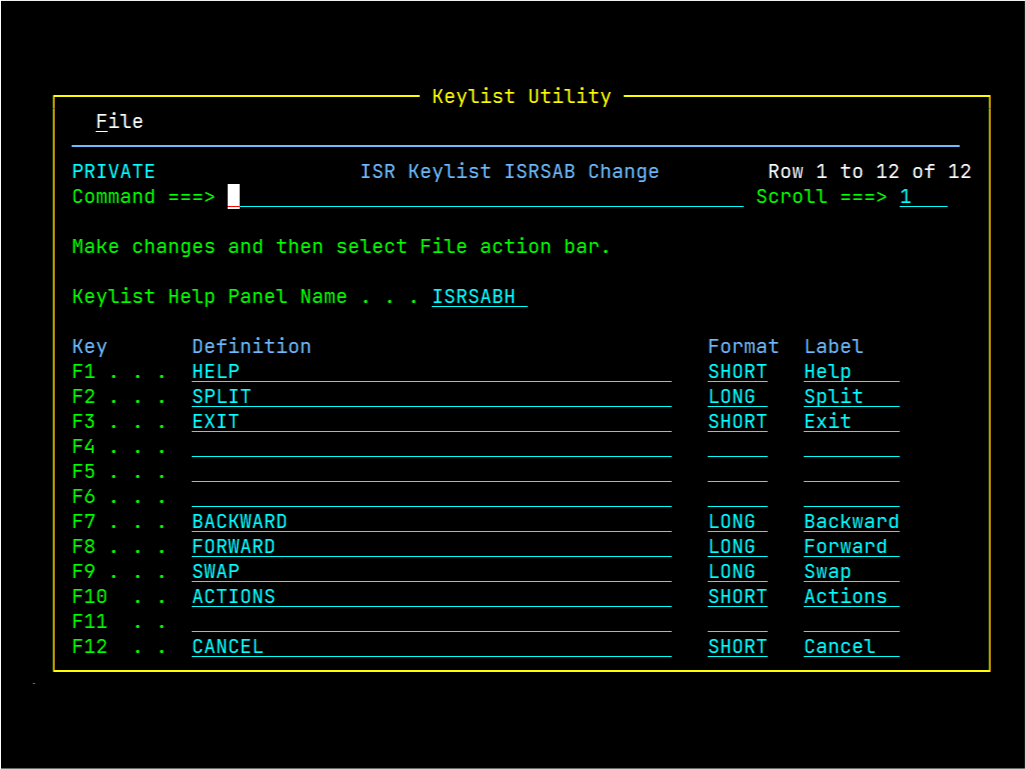
This is actually a fairly straightforward panel. The confusion columns might be “Definition” and “Format.”
The Definition is the keybinding in VS Code. In ISPF this is running a function or command to perform a task, and if you get really fancy you write your REXX EXECs to do things and assign them to keys.
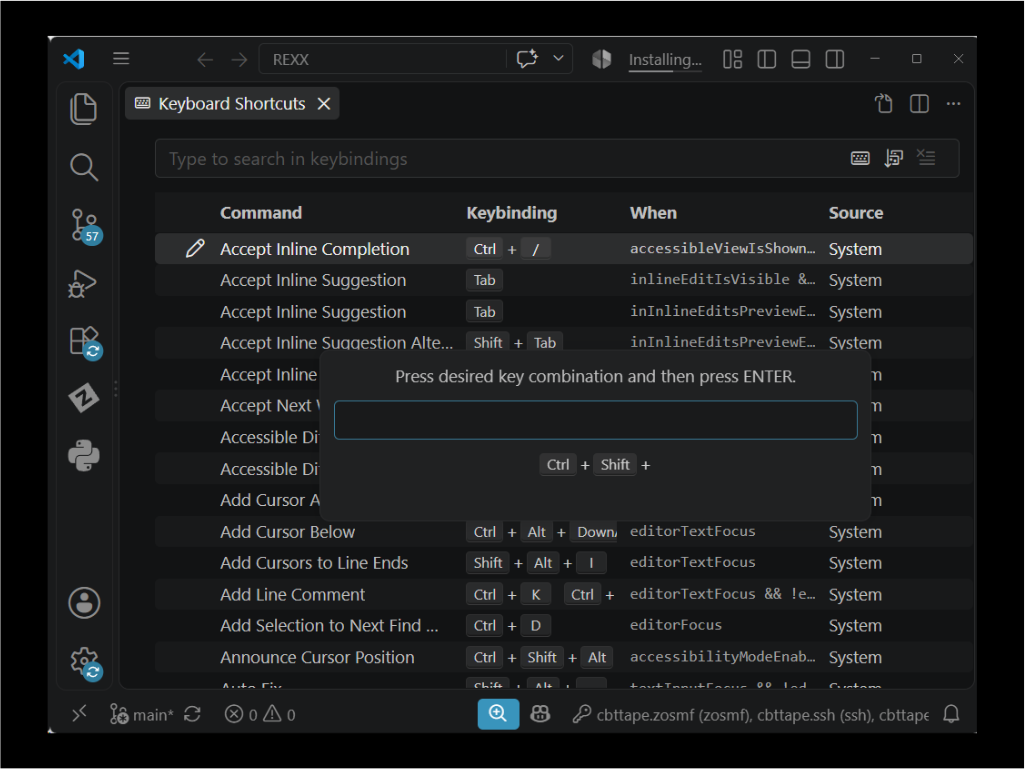
The Format field actually has three options, and it is basically a toggle to indicate when the key is shown. The three options are:
- Long – This is the default. This flag lets ISPF know you only want to display this key when the long form of keys is shown.
- Short – This flag lets ISPF know you want to display the key on the long or short version of the function key area.
- No – If you’re a supervillain and want to have a super-secret key, use this because it tells ISPF that under no circumstances should you ever show this in the function key area!
Typically F2 is assigned to the SPLIT function (see ISPF for VS Code Users: Editing Multiple Files). However, I found that in editing my files I really didn’t have to stop, go to the primary command line, type the command SAVE (to save my work) and then re-position my cursor. So I chose to re-assign F2 for ISPF Edit to the SAVE command.
Re-assigning a key is very straightforward.
- Either clear out the fields for the function key to re-assign, or find an empty one.
- In the definition field, enter the command you want to run when you press this key.
- In the format field, specify when you want this key’s label to be shown.
- In the label field, give it a short, descriptive name.
Conclusion
In this article you’ve learned how to hide and show the function key bar using the PFSHOW and FKA command, how to customize the layout of your function key bar and, lastly, how to re-assign keys to make ISPF bend to your whims.
In closing this out, as you become more and more used to working with ISPF you’ll find that the function key bar just takes up too much space. When you get there, you’ll end up turning it off and instead rely on the KEYS command to refresh your memory when it abends.
Until next time, may the code be with you.