Send Messages to a Telegram Bot from a JCL Job that Executes on z/OS
A JCL Job that executes on z/OS actually can send messages to a Telegram Bot, and I’ll demonstrate how to achieve this through a series of steps.
As a note, I worked on this proof-of-concept (POC) project on my Windows machine. Therefore, all instructions pertaining to this POC should be done on a system running Microsoft Windows OS.
Step 1: Obtain an API Token With BotFather
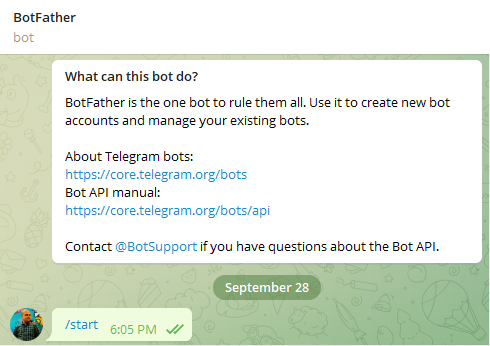
We’re going to create a new Telegram Bot. Telegram Bots are third-party applications that run inside Telegram. Users can interact with the bots by sending them messages, commands, and inline requests. The Telegram Bot API is an HTTP-based interface which has been created for developers who are keen on building bots for Telegram. And there is even a bot to help you create a Telegram bot—BotFather. BotFather is the ‘one above everything else’ bot that helps you create new bots, bot accounts and manage/change settings for your existing bots.
Open the BotFather bot. We’ll use the /newbot command to create a new bot. Follow the natural language conversation with BotFather to help complete the steps necessary to create your new bot. You need to provide a name for your new bot—I chose to name my new bot zOS-Telegram-BOT. Next, you need to choose a username for your bot, which must end in “bot.” For example: TetrisBot or tetris_bot. I chose the username zOS_Telegram_bot. You’re done—BotFather lets you know that your new bot is ready! Please refer to Figure 1 below.

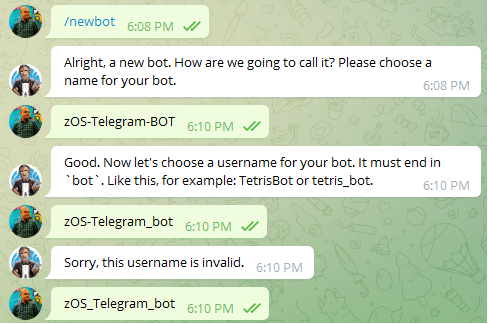

BotFather provides you with the link to access your bot. In my case, it’s http://t.me/zOS_Telegram_bot. The security token—which should only be known to you—is the most important thing that BotFather tells you. Anyone with the token can control your bot. Keep that API token handy; we’ll need it shortly.
Step 2: Obtain Your Chat id
Enter https://api.telegram.org/bot<yourtoken>/getUpdates on a new tab in your browser. Replace <yourtoken> with your API token and press enter. You should see something like the following:

Hang onto that chat id; we’ll need it shortly.
Step 3: Code a Simple Python Script
Let’s name the Python script file: zOS-Telegram-BOT.py. Save the file anywhere on your local Windows machine. The Python code should look like what’s shown in Figure 3.
import requests

def telegram_bot_sendtext(bot_message):
    bot_token = ''
    bot_chatID = ''
    send_text = 'https://api.telegram.org/bot' + bot_token + '/sendMessage?chat_id=' + bot_chatID + '&parse_mode=Markdown&text=' + bot_message
    response = requests.get(send_text)
    return response.json()

telegram_bot_sendtext("Testing our new Telegram Bot!!!")
Figure 3. Python script file code content
Key in your API token and chat id values for the bot_token and bot_chatID fields, respectively. Your script is ready to be tested!
Step 4: Test Your Python Script
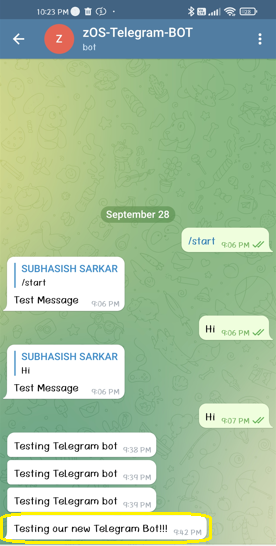
Open your Windows command prompt or any other terminal that you’re comfortable using, and CD to the path where you have saved the Python script file. Type in python “zOS-Telegram-BOT.py” then press enter.
C:Usersuser1>cd C:Usersuser1Desktop
C:Usersuser1Desktop>python "zOS-Telegram-BOT.py"
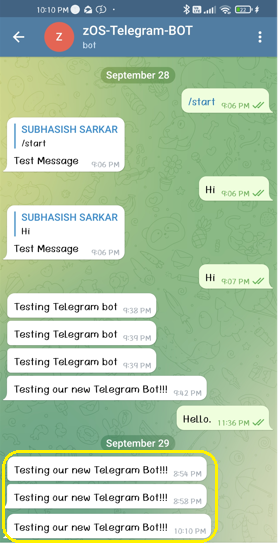
C:Usersuser1Desktop>python "zOS-Telegram-BOT.py"Once the script has successfully completed its execution, you should see the test message “Testing our new Telegram Bot!!!” successfully sent to the bot, zOS-Telegram-BOT.
Step 5: Code the JCL Job That Executes the Python Script “zOS-Telegram-BOT.py”
The JCL Job should look like the following:
//TELEGRAM JOB (5990),'EXECUTE-PYSCRIPT',CLASS=A,MSGCLASS=X,
//  REGION=0M,NOTIFY=&SYSUID
//*****************************************************************
//BPXBTCH1 EXEC PGM=BPXBATCH
//STDPARM  DD   DISP=SHR,
//         DSN=MVSSAS.CZAGENT.JOBS.SS.PERSONAL(ZOSTELGM)
//STDOUT   DD   SYSOUT=*
//STDERR   DD   SYSOUT=*
//CEEDUMP  DD   DUMMY
//*
//
Content of the ‘YOUR.PDS(ZOSTELGM)’ member should be:
sh python3 /home/user/zOS-Telegram-BOT.py
NOTE: python3 is the Python installation path; for example, /usr/lpp/IBM/cyp/v3r8/pyz/bin/python3. Check with your system administrator if you’re not sure about the path where Python installation has been done at your shop.
We’re going to create the Python file, zOS-Telegram-BOT.py, in the USS path /home/user/. You can reuse the code in the Python script that you have already created and saved on your local Windows machine.
BPXBATCH is a utility used to run shell commands or executable files through the batch facility. You can invoke BPXBATCH from a batch job, like we have chosen to do. To know more about the BPXBATCH utility, you can refer to the IBM documentation at BPXBATCH utility – IBM Documentation.
Step 6: Run the JCL Job That Executes the Python Script ‘zOS-Telegram-BOT.py’
Submit the JCL Job. If everything goes as expected, the Job should complete its execution with RC=0000. Once the Job completes its successful execution, you should see the test message “Testing our new Telegram Bot!!!” successfully sent to the bot zOS-Telegram-BOT.
You have now successfully sent messages to your Telegram Bot by executing a JCL Job on z/OS.